Teams
Learn how to manage teams in the SiteBox DashboardManage teams at Company level
In the company scope, teams play a pivotal role in organizing and managing access permissions efficiently. Here's how they function:
- List company teams – this section provides you with a comprehensive list of teams associated with your company. Each team is a group of users assembled for specific purposes or projects.
- Assigning permissions – teams offer a streamlined way to grant permissions to multiple users simultaneously. They serve as a convenient container for managing access collectively.
- Default permissions – it's essential to note that a group doesn't come with any permissions by default within the company scope. Each team requires specific permissions to be assigned on project and environment levels to access and interact with resources.
- Merged permissions – the beauty of teams is that their permissions can be seamlessly merged with personal permissions. Neither group nor personal permissions override the other; instead, they dynamically merge to provide the desired flexibility level. This ensures that users have the right level of access to company resources while preserving individual access settings.
By leveraging teams within the company scope, you can efficiently organize and assign permissions, fostering collaboration and resource management, all while ensuring that access control remains flexible and tailored to your organization's needs.
How to add a team to the Company?
To add a new team to your company, follow these steps:
-
Click the "Add team" button.

-
After clicking the button, a modal window will appear, providing the means to create a new team within your company.
-
In the modal, you will find two input fields: "Team Name" and "Team Description". In "Team Name" enter a name for your new team, and in "Team Description", provide a brief description or context for the team's role or purpose.

-
Once you've filled out the form with the team's name and description, click the "Add team" button.
-
Upon completing this action, the new team is now successfully added to your company.
This straightforward process allows you to efficiently create and manage teams within your organization, enhancing collaboration and access control while keeping your teams organized and well-documented.
How to customize the Company's team?
To customize or delete a team, follow these steps:
-
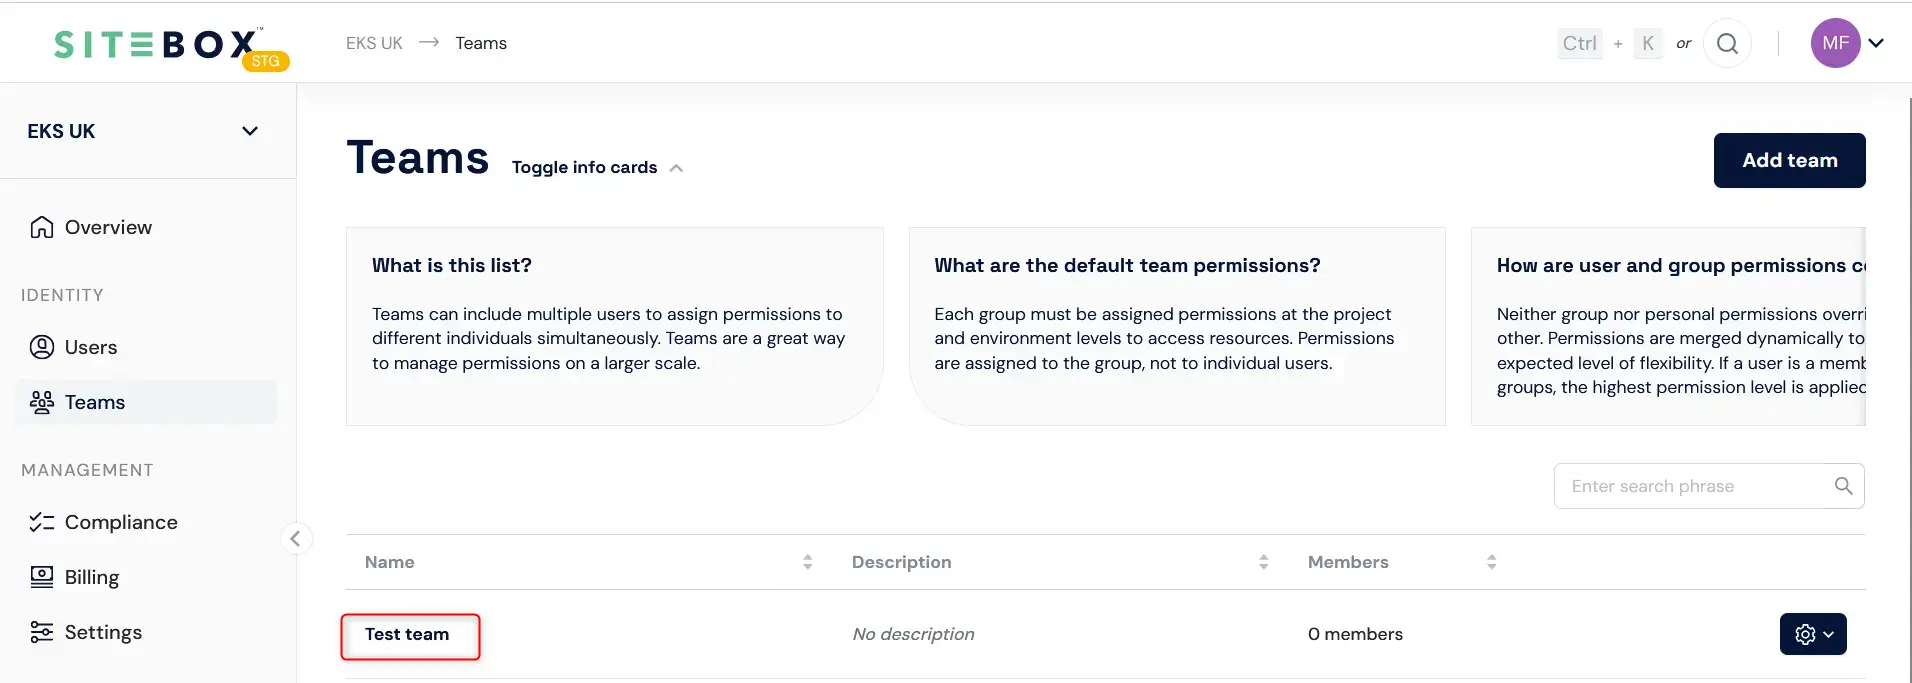
Click on the team you want to manage from the list of teams.
-
You will be redirected to a dedicated page for that specific team, where you can:
- Edit team information – update the team's name and description to reflect any changes or new information relevant to the team's purpose.
- Manage team members – add or remove members from the team, ensuring that the right individuals have access to the team's resources.
- Delete the team – if necessary, you can delete the team by clicking the "Delete Team" button. A confirmation prompt will appear, and clicking "Confirm" will permanently remove the team.
By following these steps, you can access and customize your team's settings and composition, aligning them with your organization's needs and promoting efficient collaboration and resource management within the SiteBox Dashboard.
How to add a user to the Company's team?
To add a user to your team, follow these steps:
-
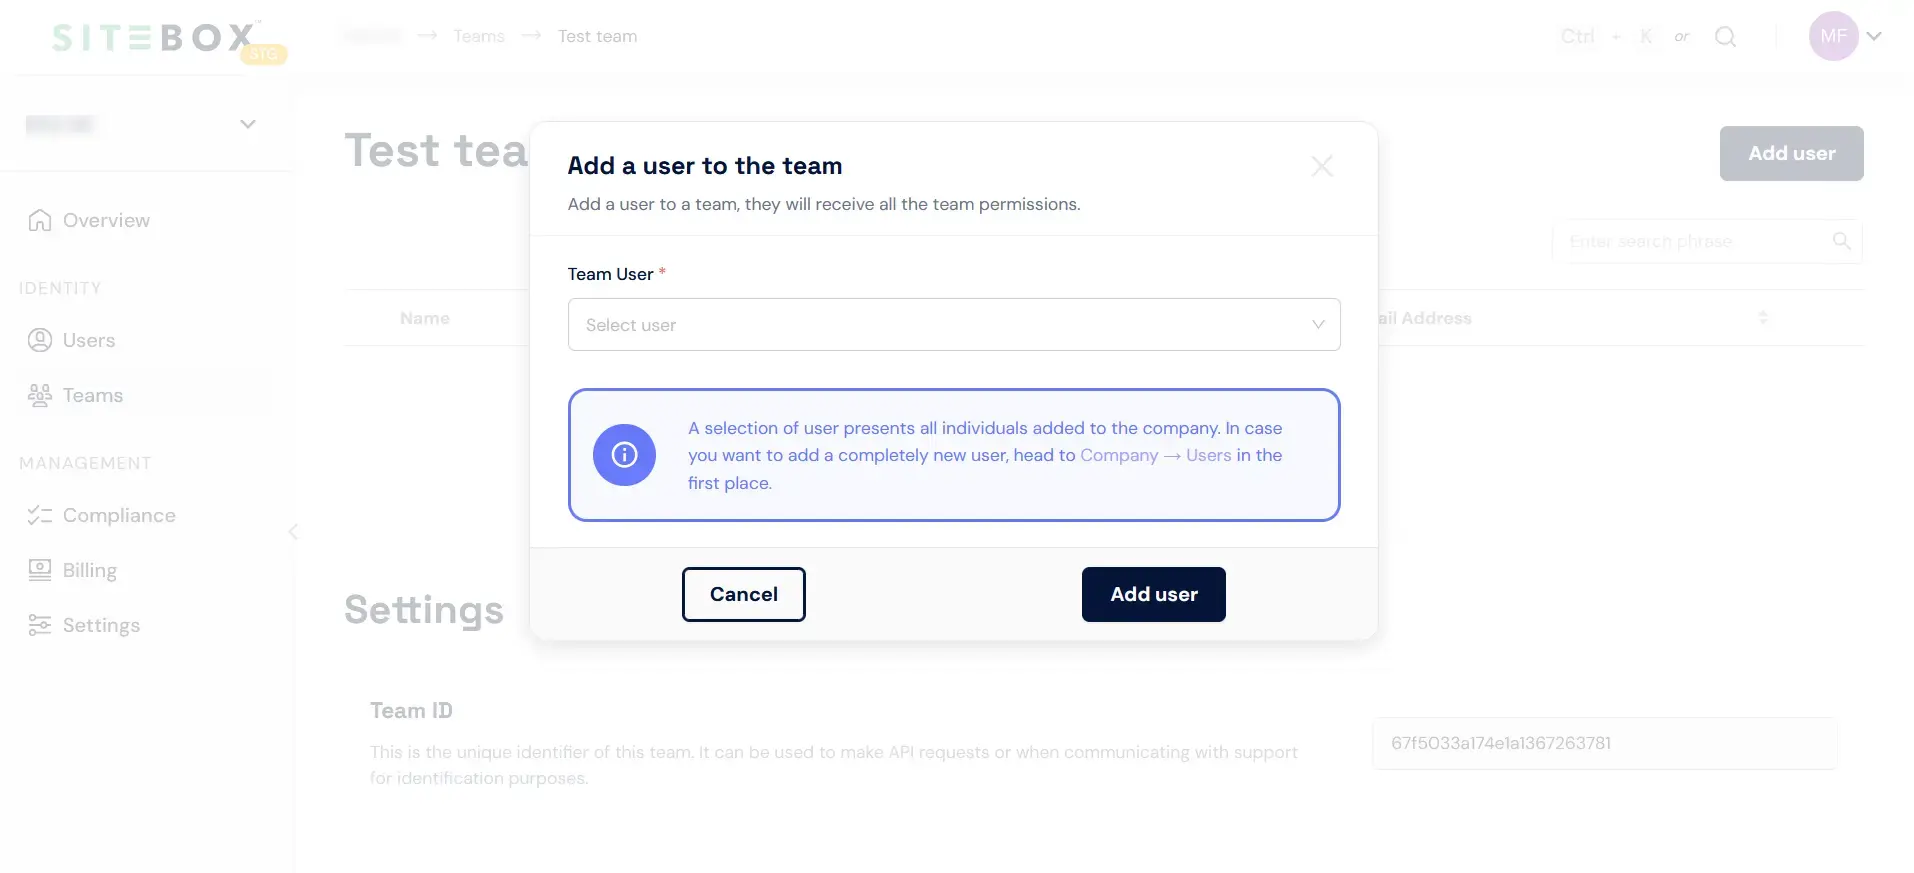
Click the "Add user" button.

-
A modal window will appear, displaying a dropdown select with users added to your company. This selection includes all individuals who have been added to your company. If you need to add a completely new user, you should first go to
Company > Users. -
Choose the appropriate user from the dropdown list.
-
Finally, click the "Add user" button to add the selected user to your team.
How to remove the user from the Company's team?
To remove a user from your company team, please follow these steps:
-
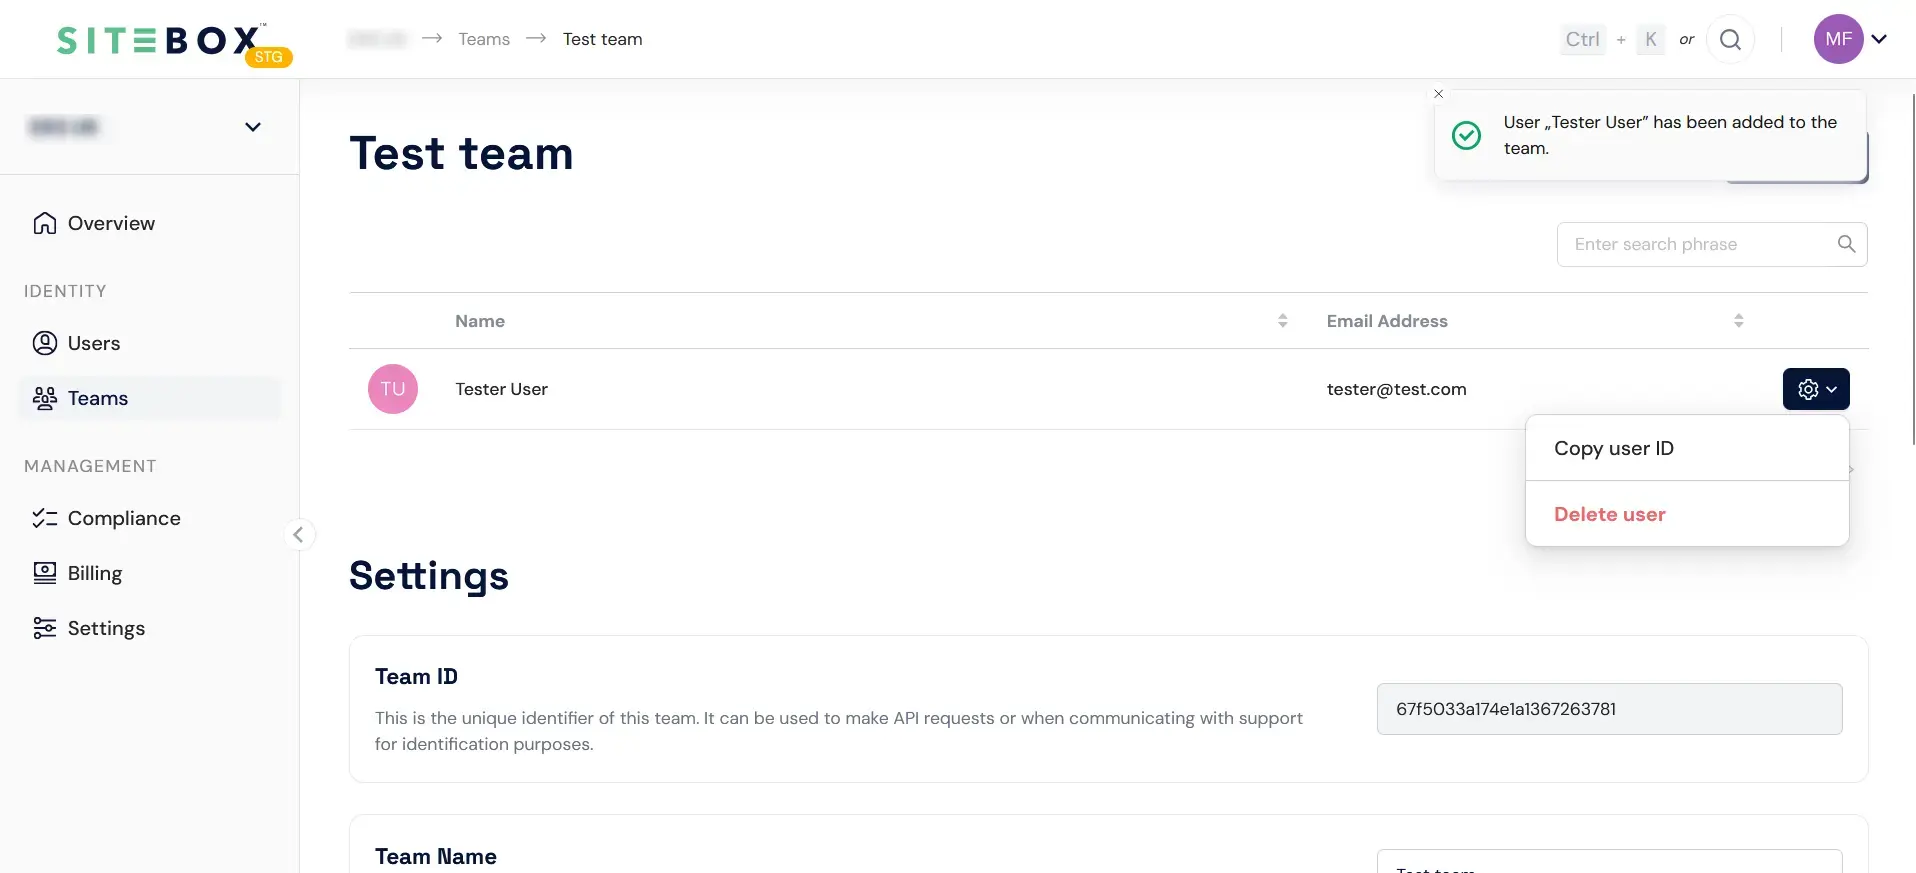
Within the team list table, hover your mouse over the gear-shaped icon corresponding to the user you wish to remove.
-
While hovering over the gear-shaped icon, the "Delete user" button will appear.
-
Click on the "Delete use" button.
-
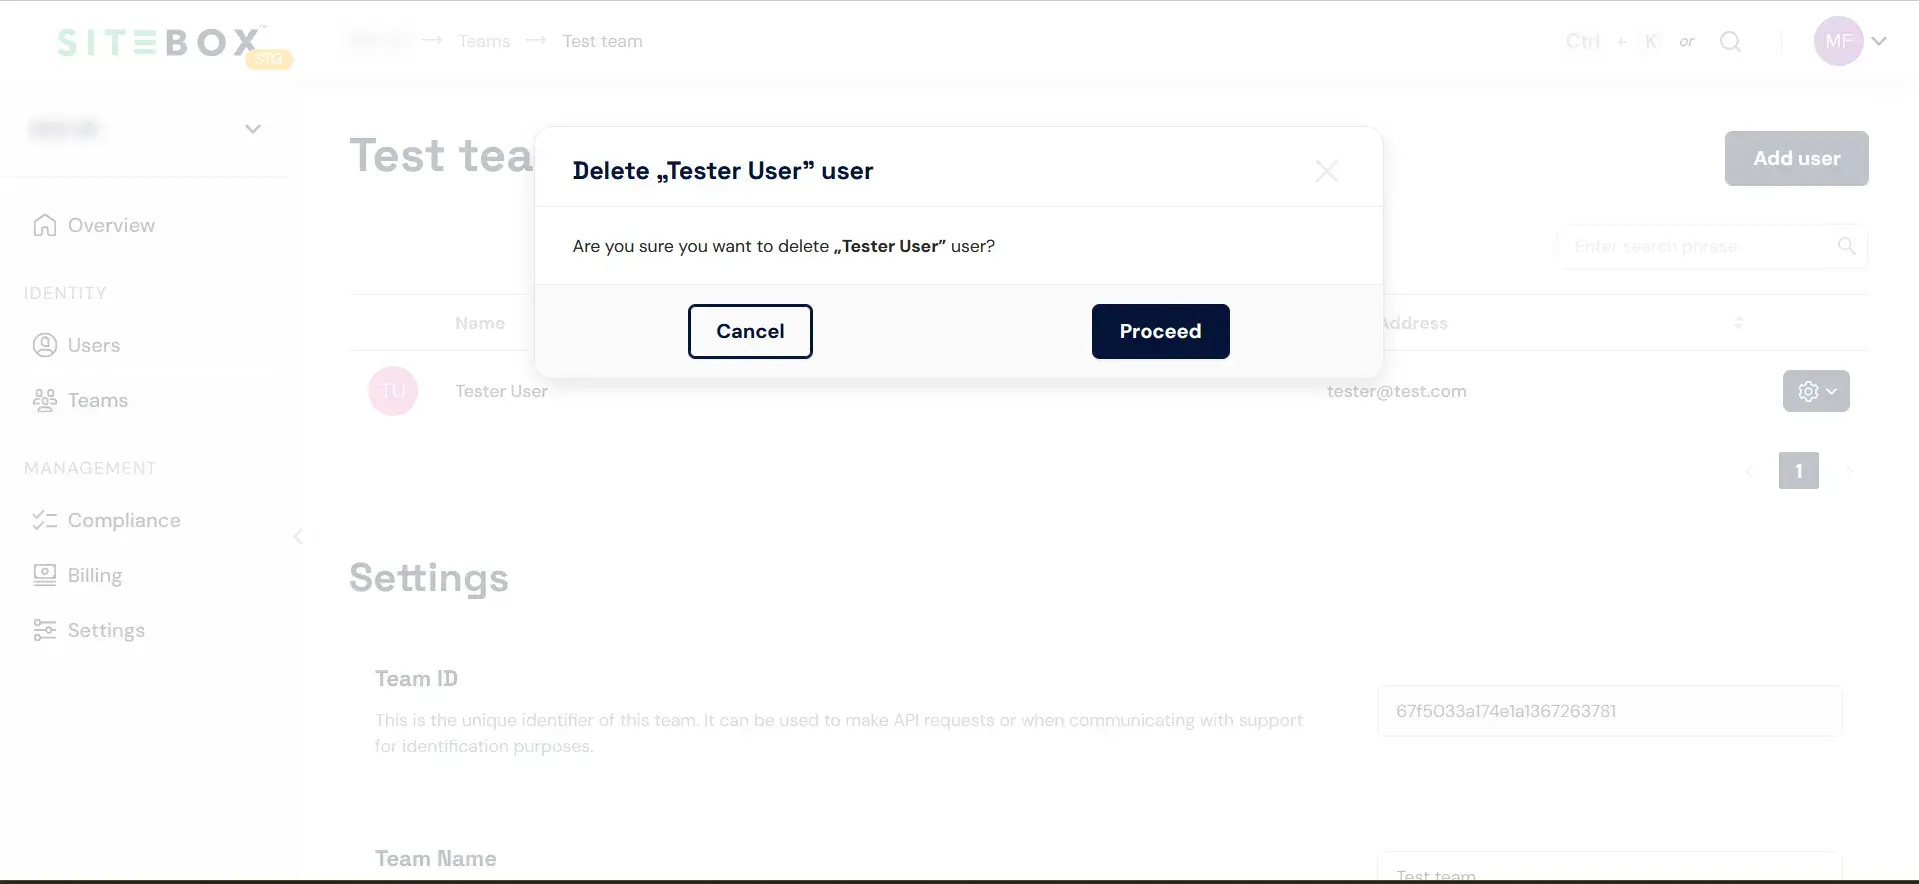
A confirmation popover will appear, asking you to confirm the user's removal.
-
To confirm the removal, click the "Proceed" button.
How to edit team name and description?
To change the team's name or description, follow these steps:
-
Click on the input field for the team's name or description that you wish to edit.
-
After clicking the input field, you can edit the team's name or description as needed.

-
Once you've made the desired changes, a popover will appear, prompting you to confirm the modification.
-
Click the "Update" button in the popover to save the updated name or description.
How to delete the Company's team?
To delete a team from your company, follow these steps:
-
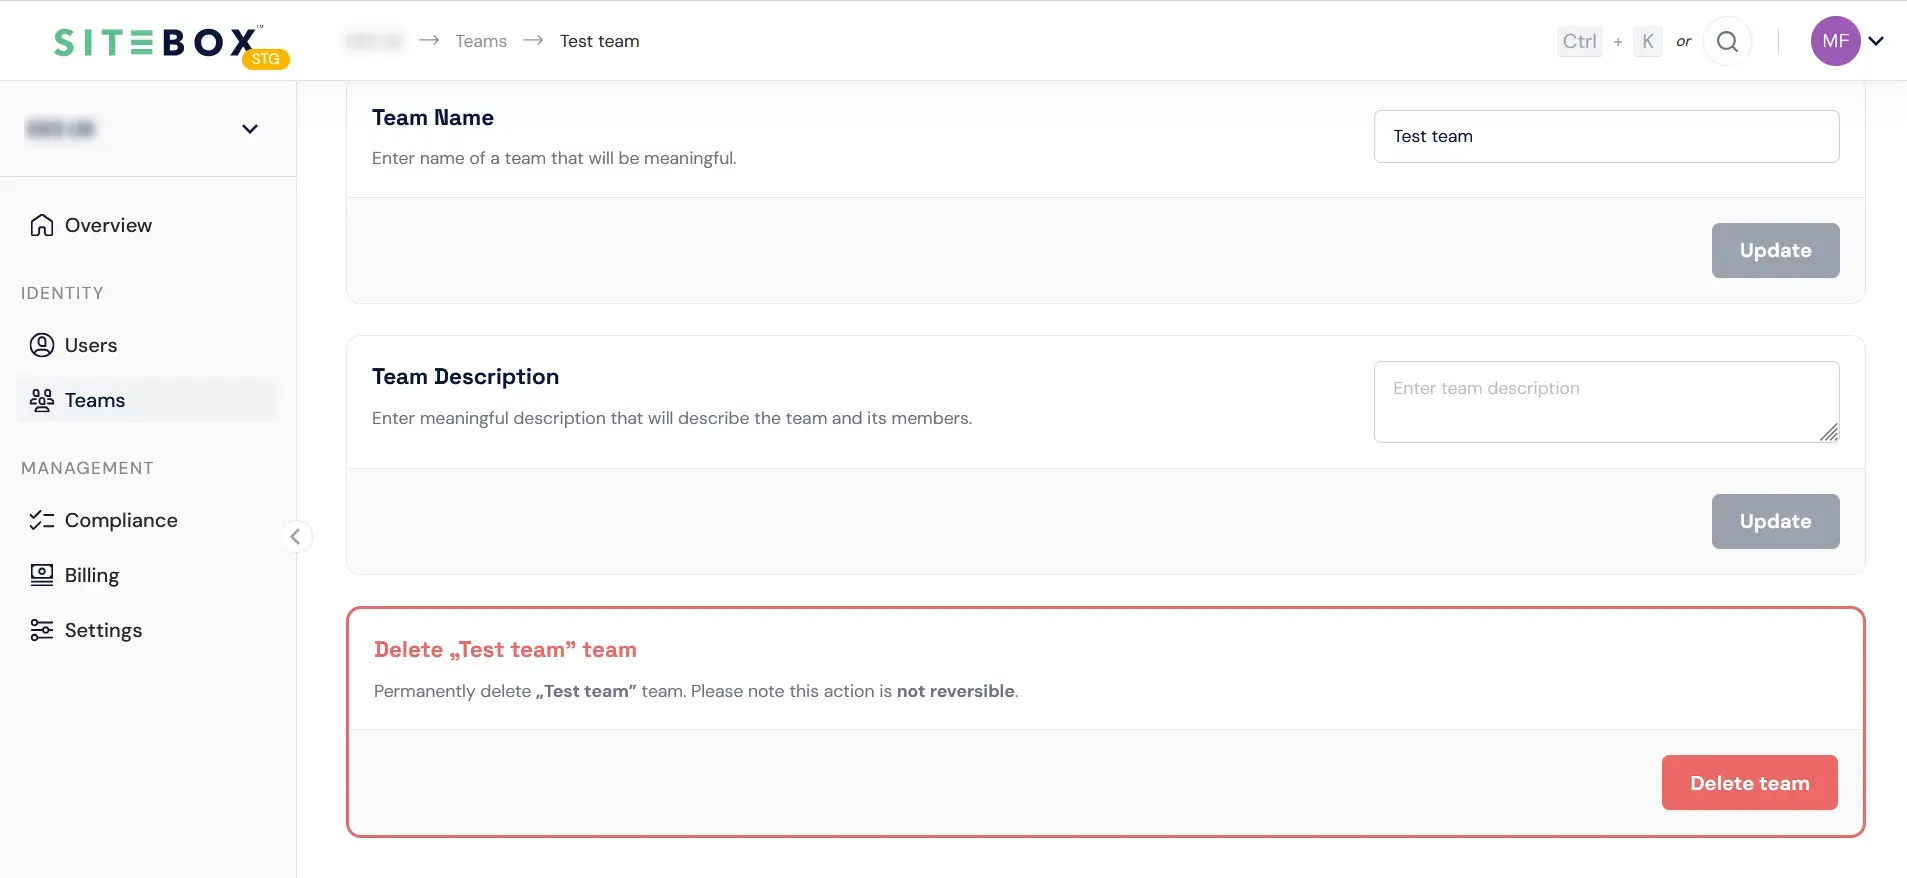
Click on the "Delete team" button.
-
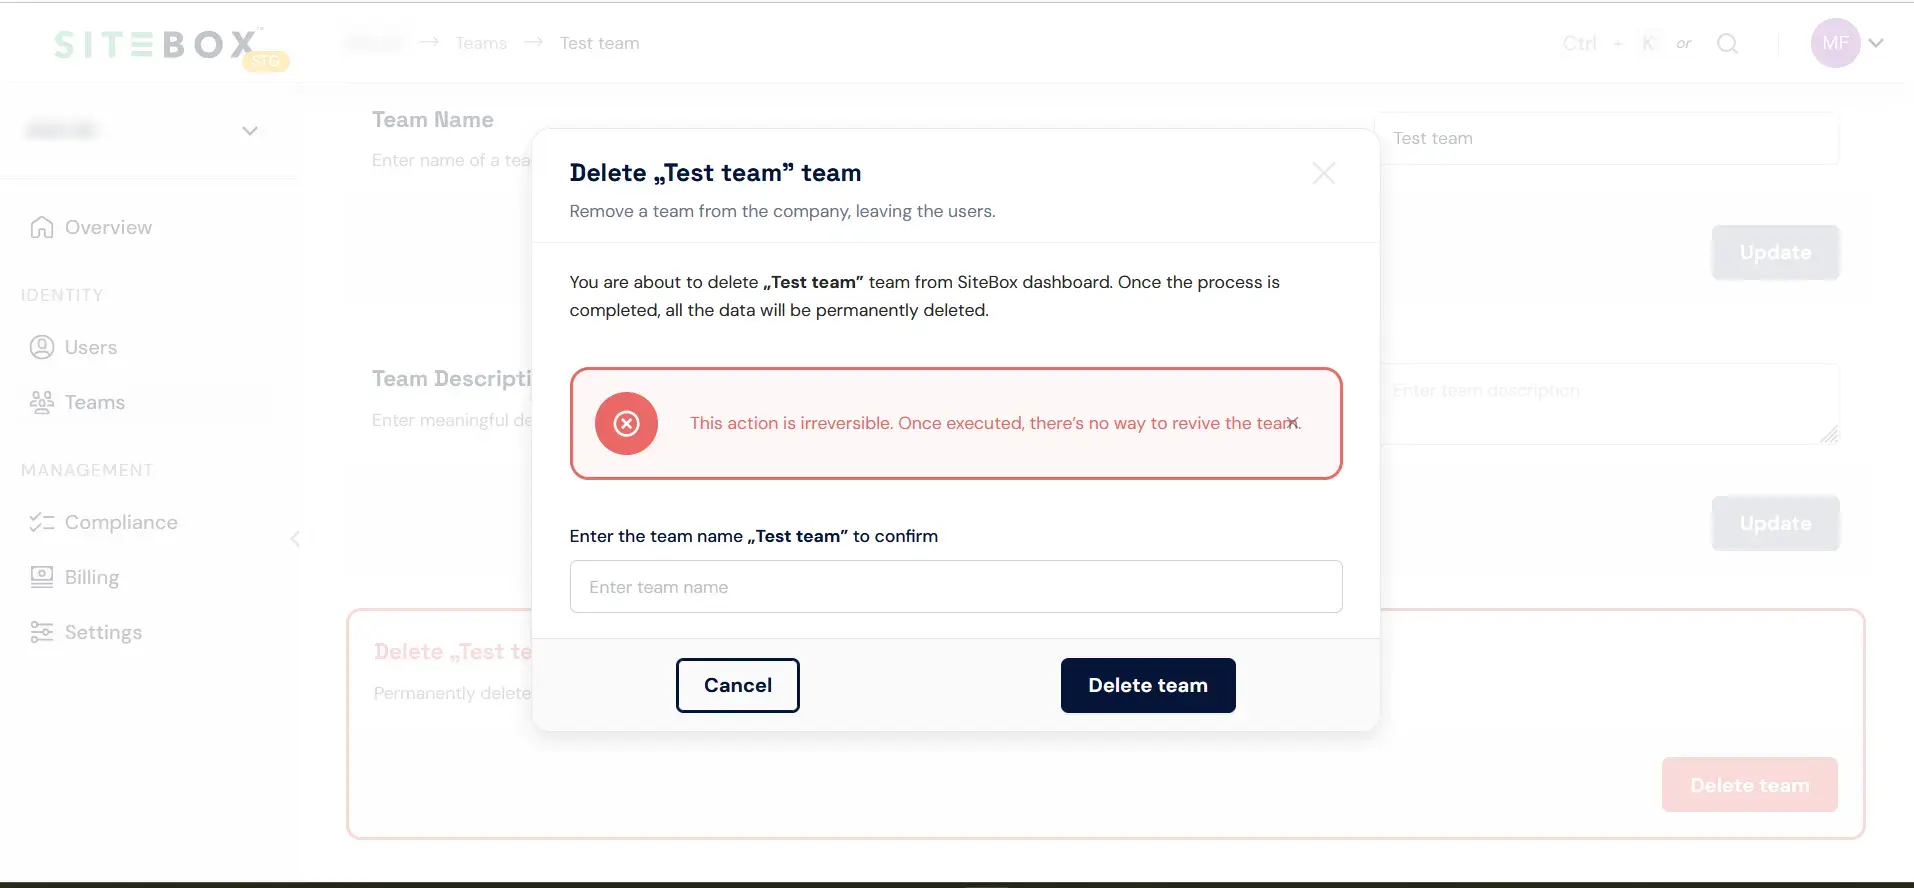
A modal window will appear to confirm the deletion. This is a critical step, as it involves permanently removing the team and all its associated data from the SiteBox Dashboard.
-
In the modal, enter the name of the team in the provided input field.
-
Finally, click the "Delete team" button to proceed with the deletion.
By following these steps and confirming the deletion, you are taking a decisive action that cannot be undone. Ensure that you're fully aware of the consequences before proceeding.
Manage teams at Project level
Within the context of your project, you possess the valuable capability to integrate existing company teams seamlessly and tailor their permissions. This empowers you to finely tune the access and privileges granted to these teams across various project aspects, encompassing the project itself, regular environments, and protected environments.
By harnessing the power of company teams, you can efficiently organize your project resources, ensuring that the right teams have access to the right parts of your project.
How to add a team to the Project?
To add an existing team to your project level, follow these steps:
-
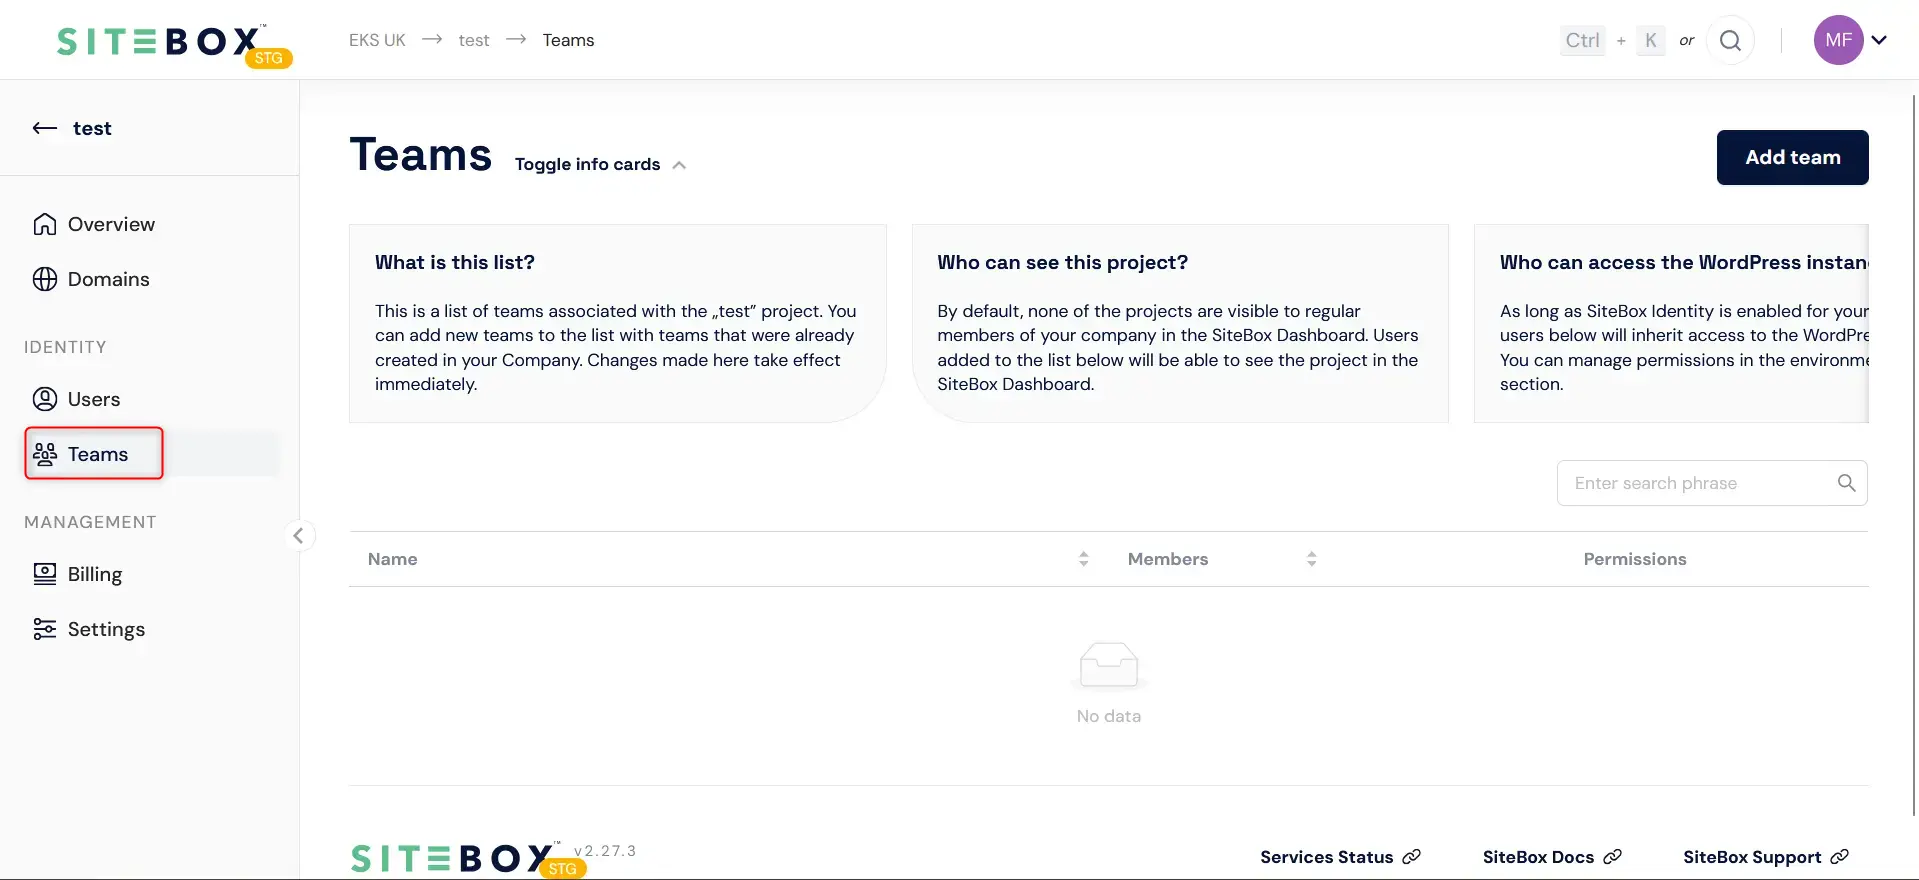
Ensure that you are on the "Teams" tab within your project, accessible from the project level.
-
Click on the "Add team" button.
-
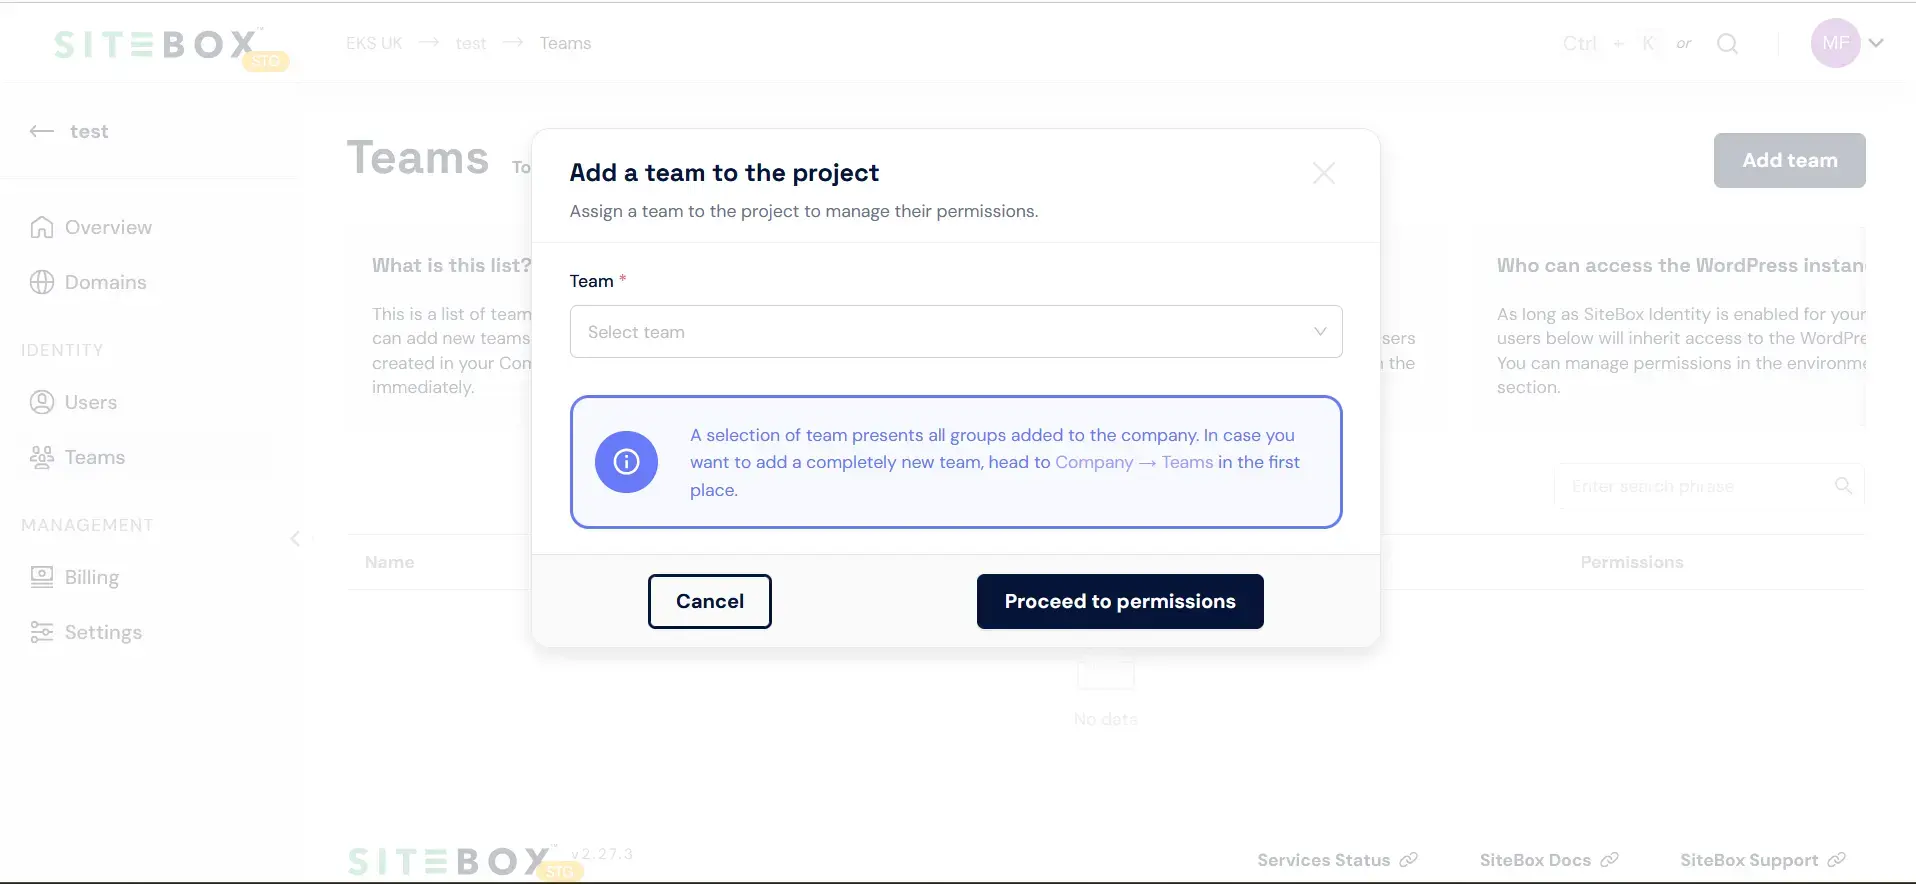
A modal window will appear, and you will see a selector dropdown menu.
-
From the dropdown menu, choose the team that was previously created at the company level and that you want to add to your project.
-
After selecting the team, click the "Proceed to Permissions" button.
-
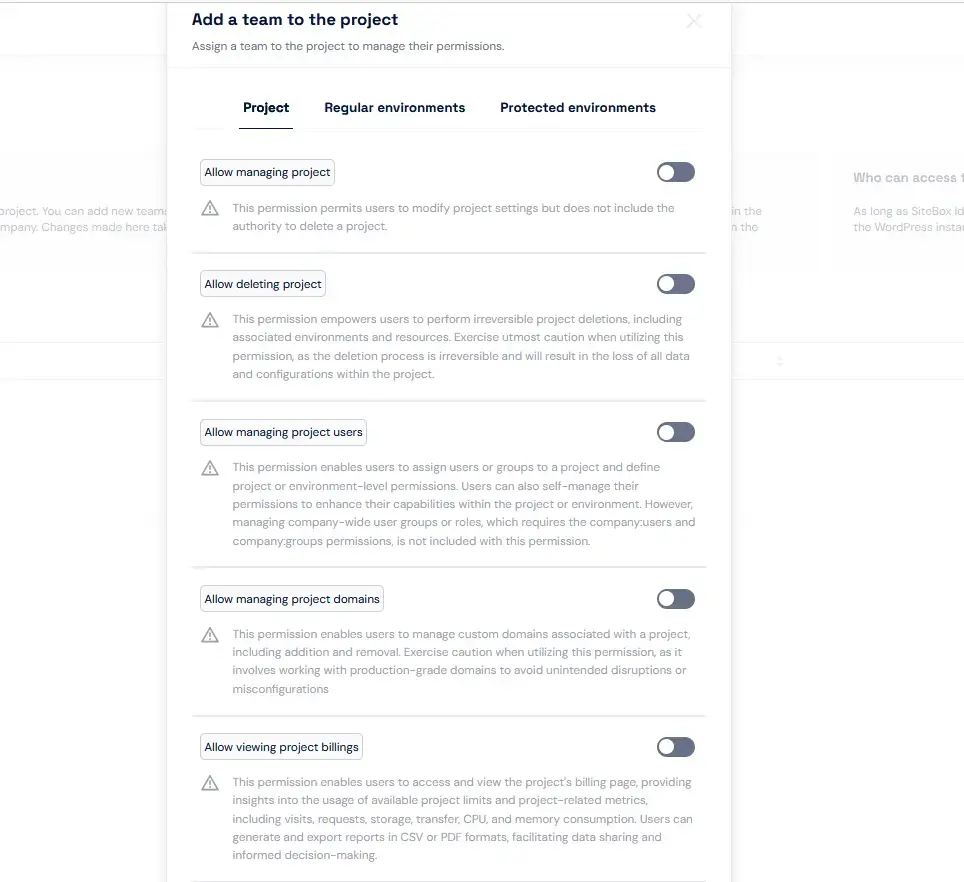
On the Permissions page, you will see a list of permissions for the Project, Regular Environments, and Protected Environments. Select the permissions that are suitable for your project's needs.
-
After choosing the relevant permissions, click the "Add team" button.
By following these steps and ensuring that you are within the "Teams" tab of your project, you can successfully add an existing team to your project level, ensuring that it has the appropriate permissions to collaborate effectively within the SiteBox Dashboard.
How to edit team's permissions on the Project?
Editing permissions for a team is a straightforward process:
-
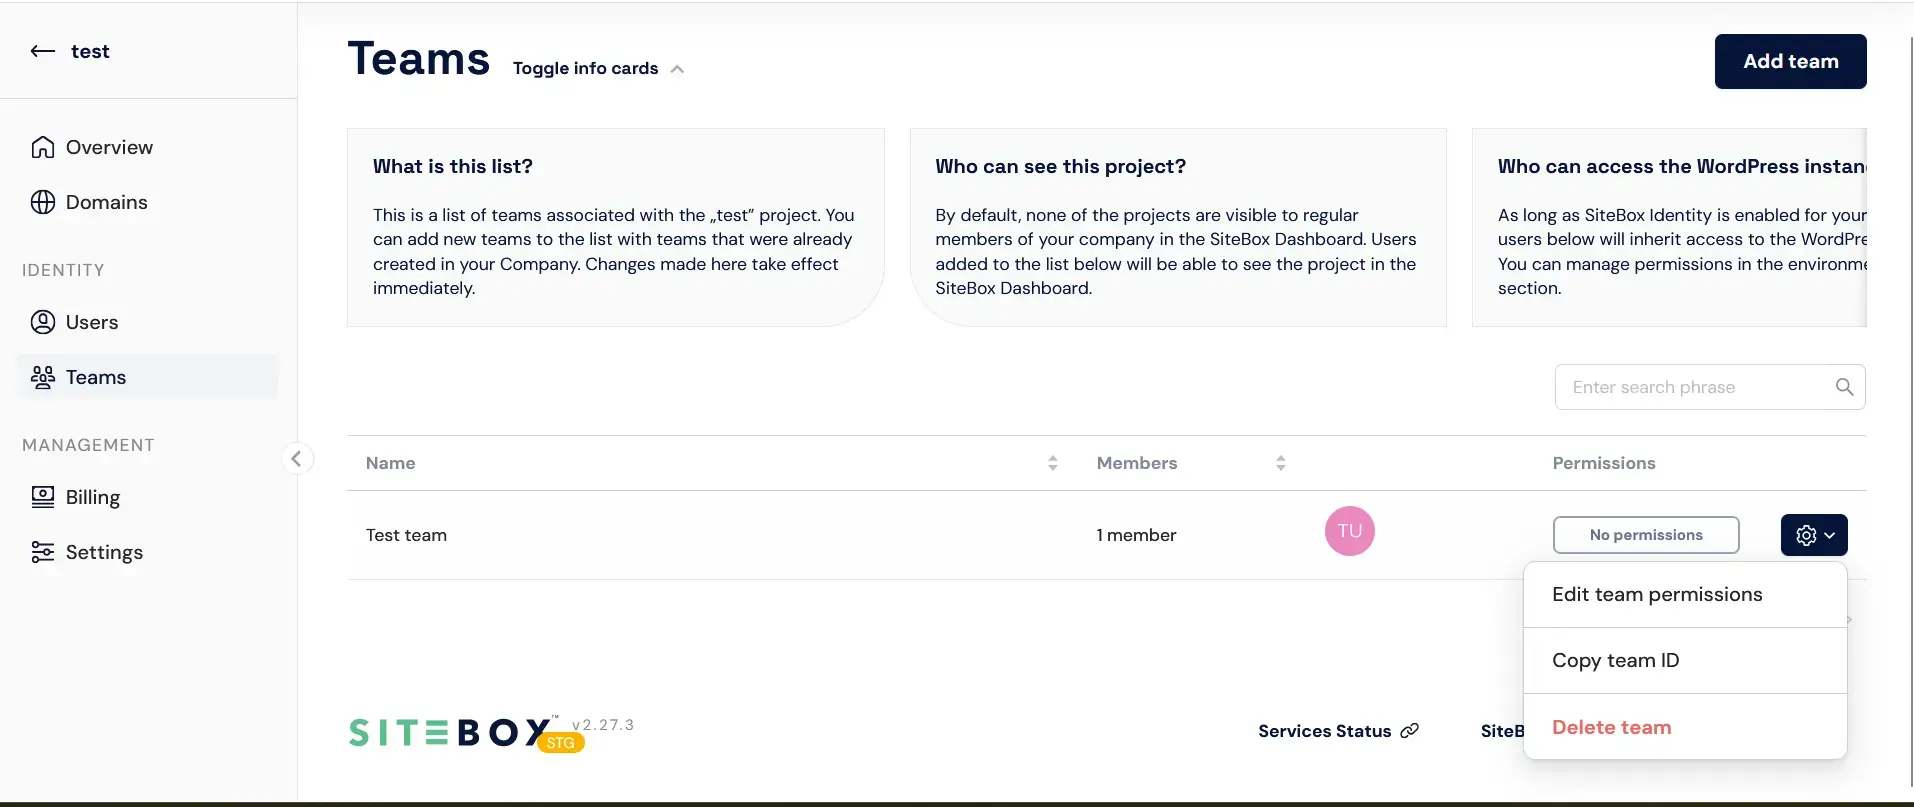
Hover your mouse over the gear-shaped icon located on the list of teams added to your project scope.
-
Click on the "Edit permissions" option.
-
A modal window will appear, presenting you with a selection of permission settings that you can adjust.
-
Customize the permissions as required, specifying what actions and resources the team can access within the project, regular environments, and protected environments.
-
Once you've adjusted the permissions to your liking, confirm your changes by clicking "Update permissions" button.
How to remove the team from the Project?
To remove a team from your project level, follow these steps:
-
Hover your mouse over the gear-shaped icon located on the list of teams added to your project scope.

-
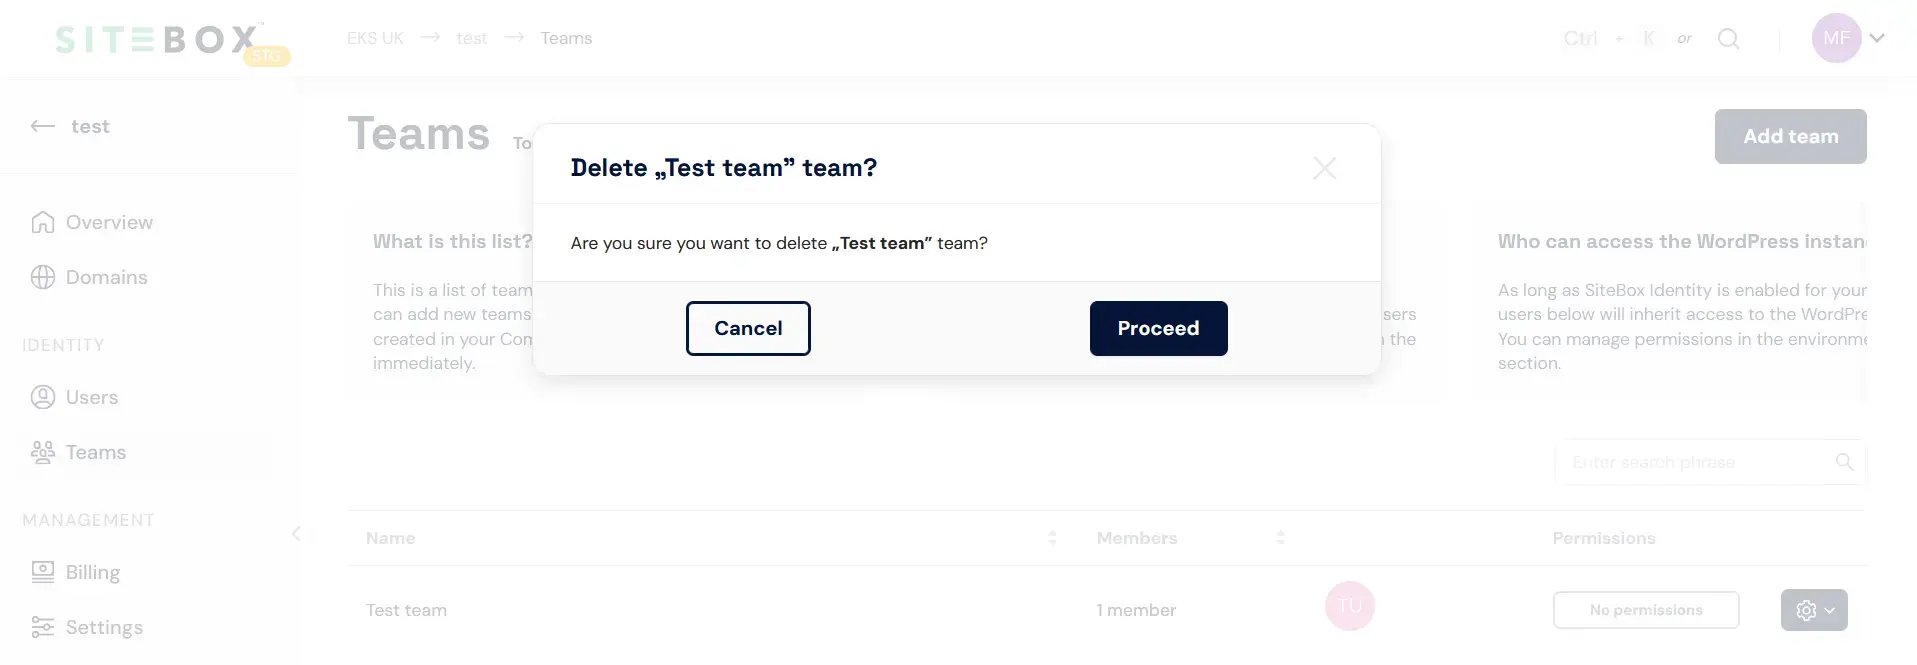
A popover will appear with the option to remove the team.
-
Click the "Proceed" button within the popover.
By following these steps, the team will be successfully removed from your project level.
Manage teams at Environment level
At the environment level, you have the ability to add teams that were originally created at the company level and assign specific WordPress roles to the entire team. This means that you can grant the entire team a particular role within WordPress, such as Member or Administrator.
This functionality simplifies access management within your WordPress instance by allowing you to apply role-based permissions at the environment level, ensuring that team members have the appropriate level of access and control over the WordPress environment associated with your project. This streamlines the process of configuring permissions for multiple team members simultaneously, enhancing efficiency and security in your SiteBox Dashboard workflow.
How to add a team to the Environment?
-
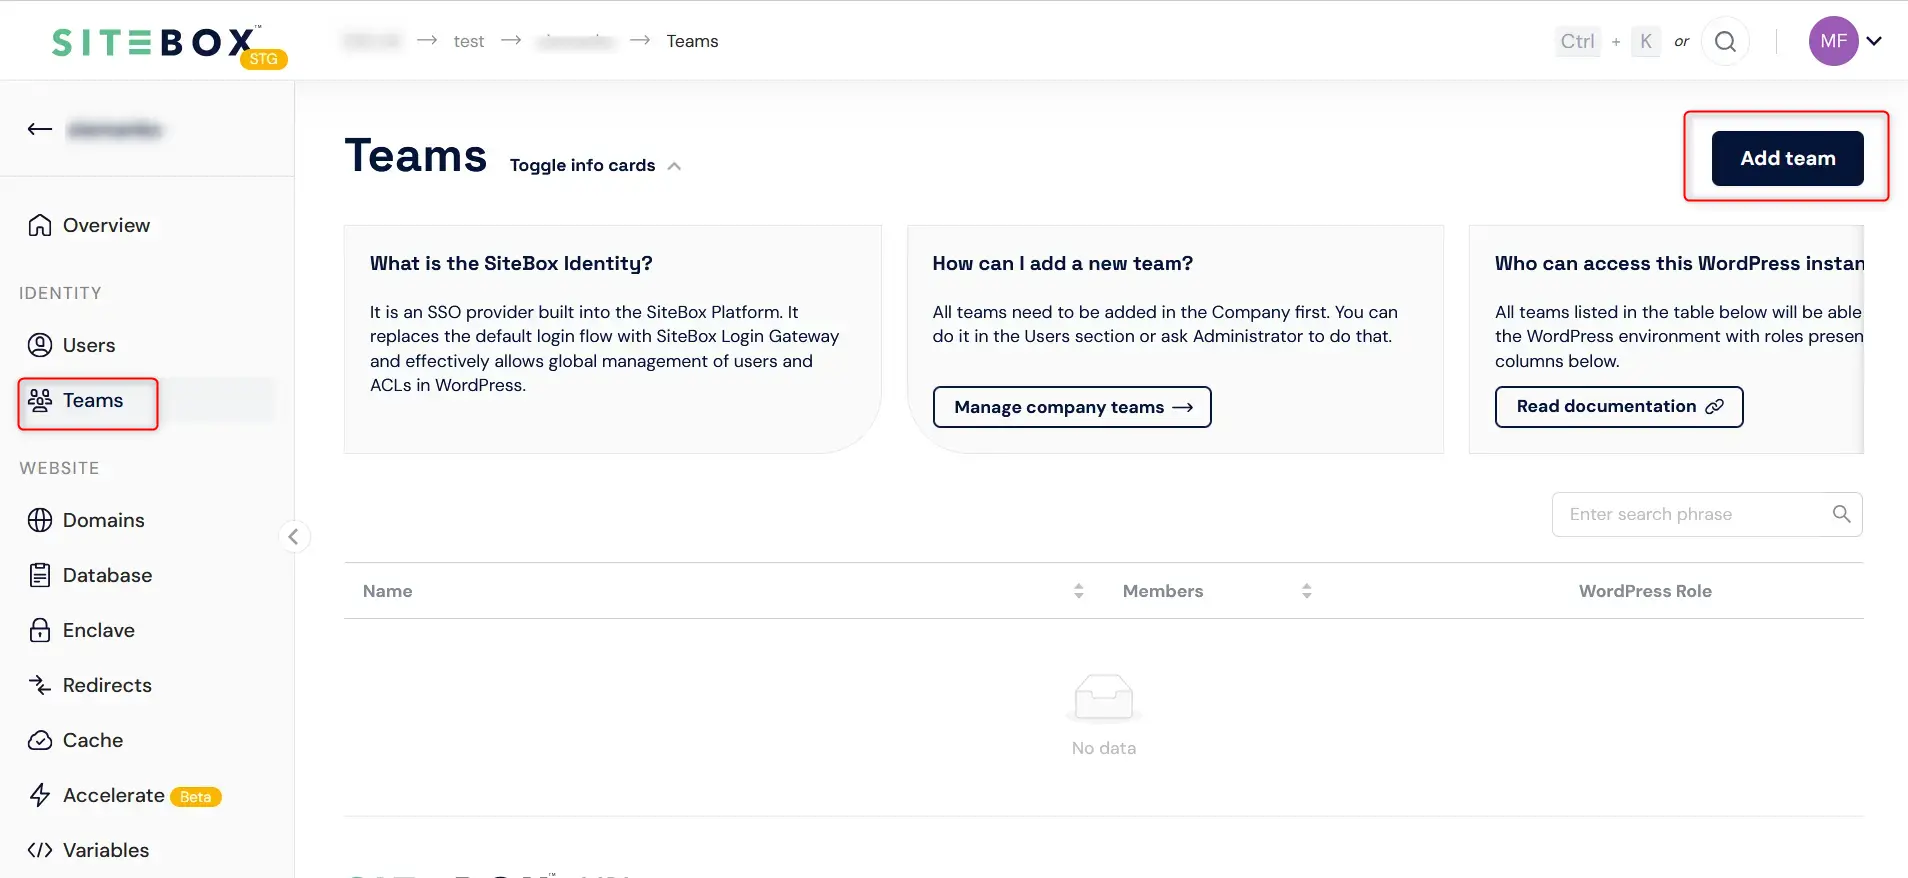
Navigate to the "Teams" tab within your environment, accessible from the environment level.
-
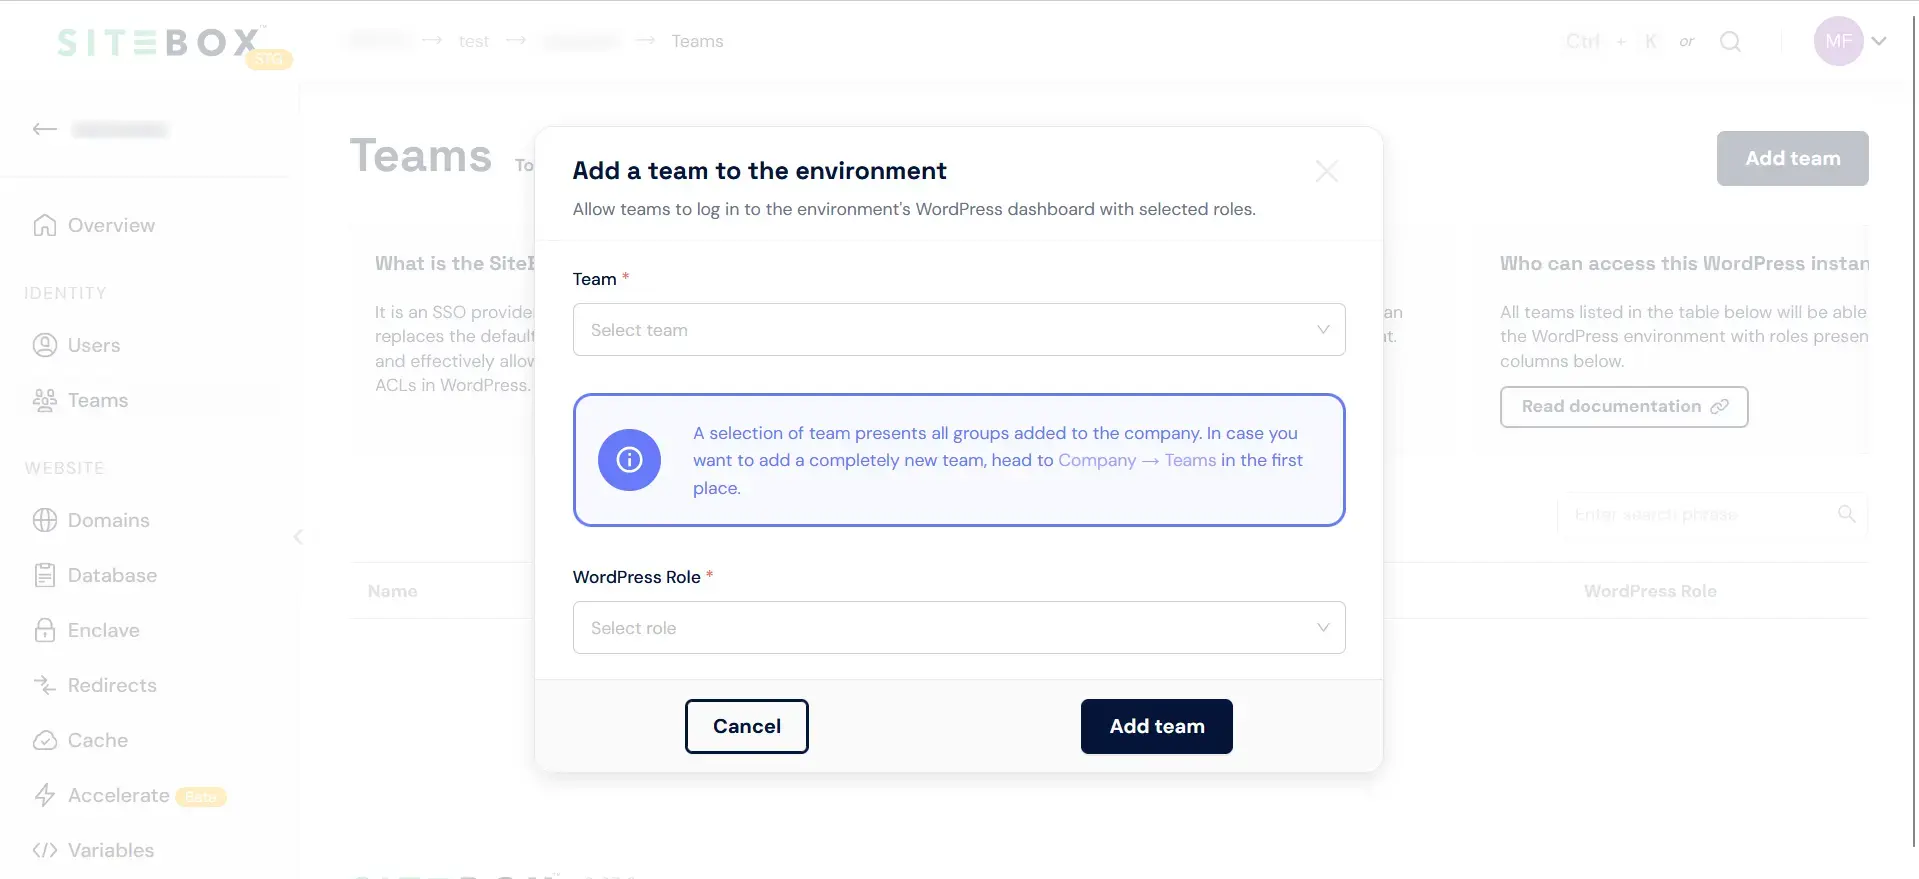
Click the "Add team" button.
-
A modal window will appear, displaying a selector dropdown menu. From the dropdown menu, select the team that was previously created at the company level and that you want to add to your environment.
-
After selecting the team, choose the desired WordPress role you would like to assign to the entire team.
-
Once you've selected the relevant WordPress role, click the "Add team" button.
By following these steps, you can successfully add an existing team to your environment while specifying the WordPress role assigned to the entire team.
How to edit team's role
To edit the WordPress role assigned to a team within your environment, follow these steps:
-
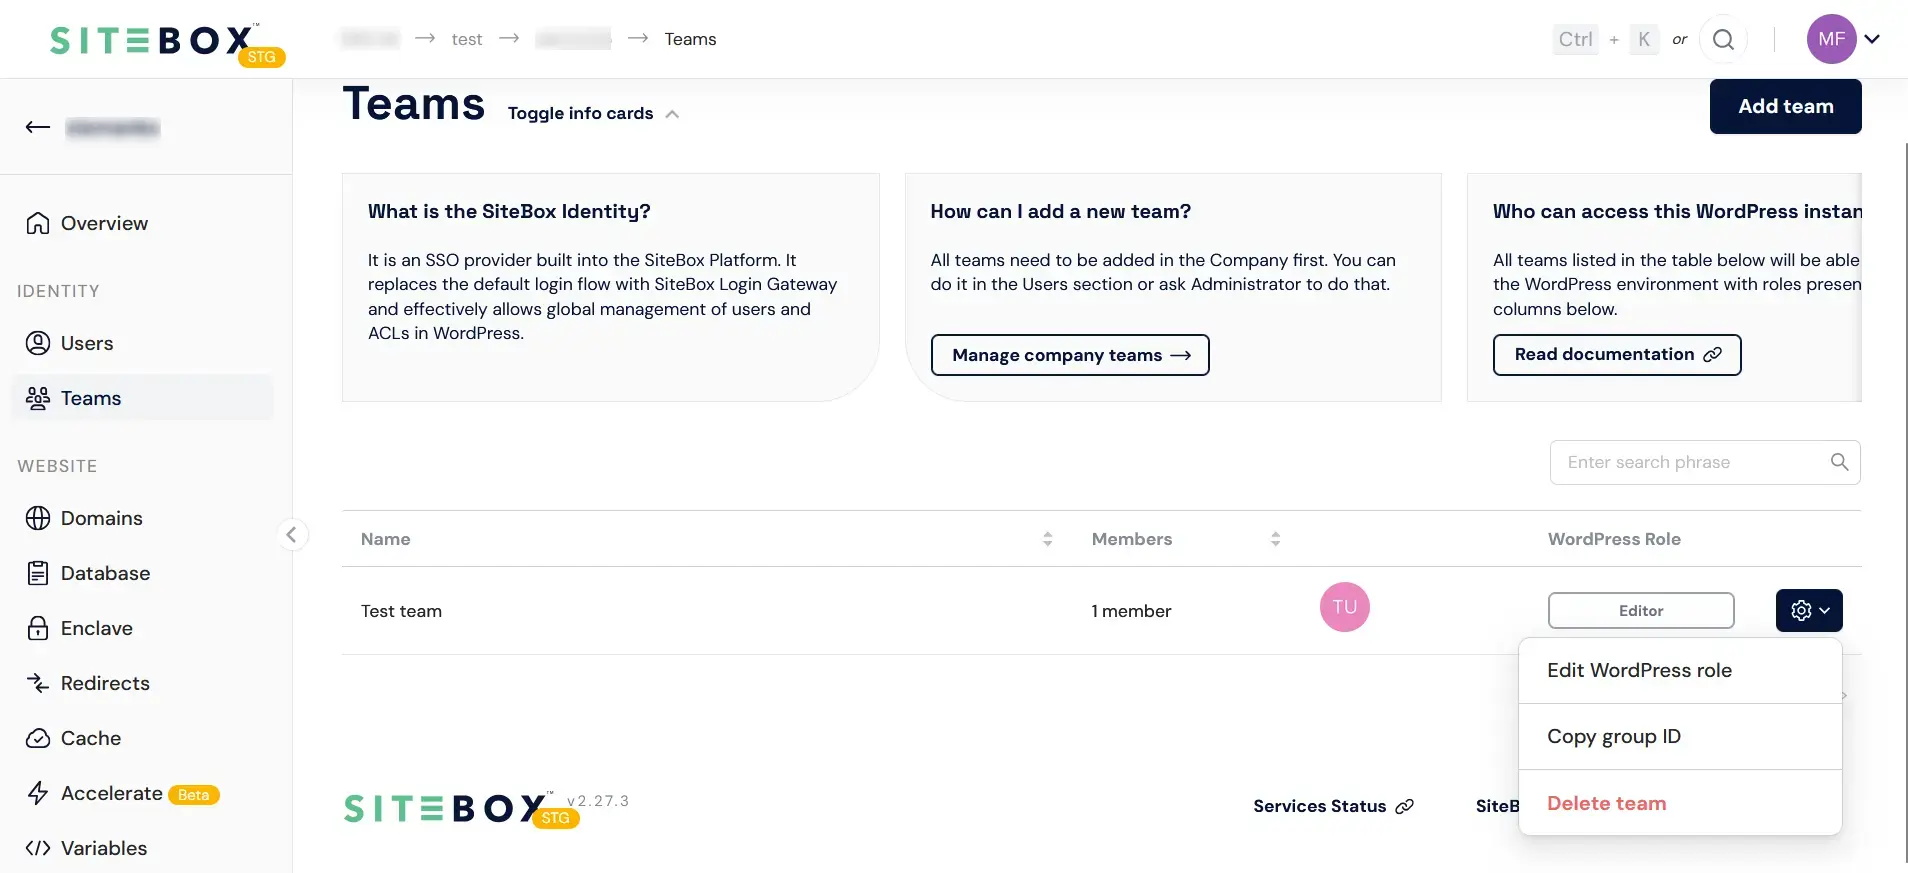
Hover your mouse over the gear-shaped icon located on the list of teams added to your environment scope.
-
Click on the "Edit WordPress role" option.
-
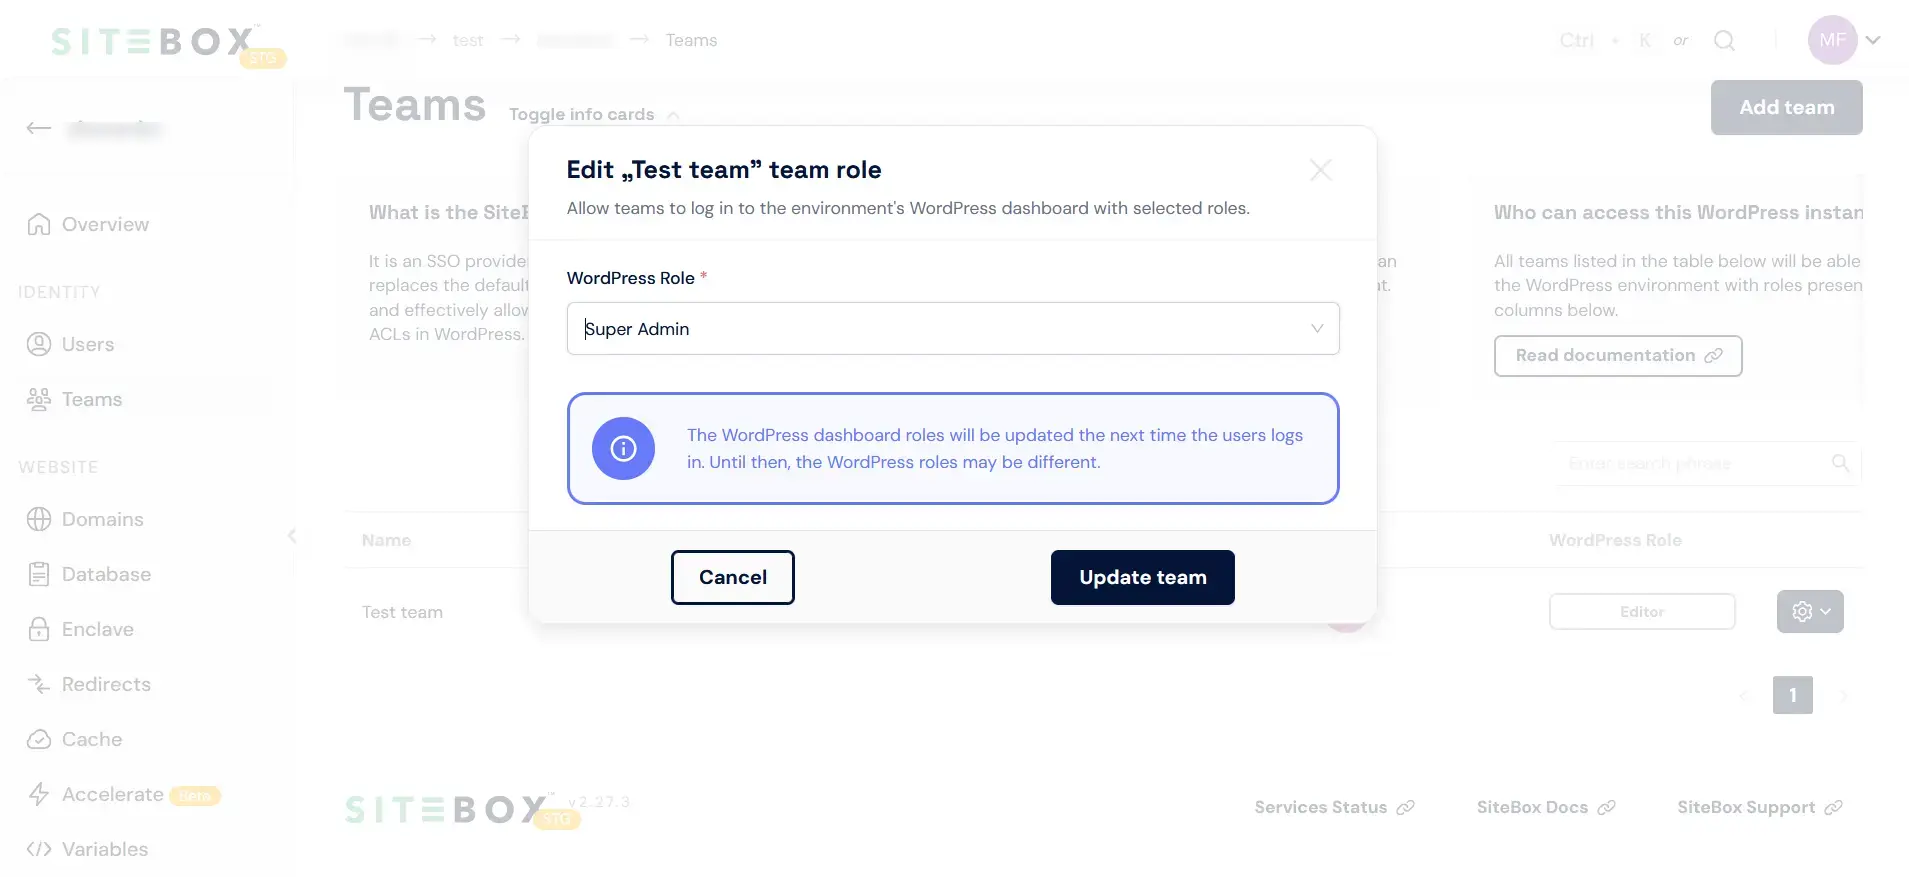
A modal window will appear, presenting you with a selection of WordPress roles that you can assign to the team.
-
Choose the desired WordPress role from the dropdown menu.
-
Once you've selected the relevant WordPress role, click the "Update team" button.
How to remove the team from the Environment
To remove a team from your environment level, follow these steps:
-
Hover your mouse over the gear-shaped icon located on the list of teams added to your environment scope.

-
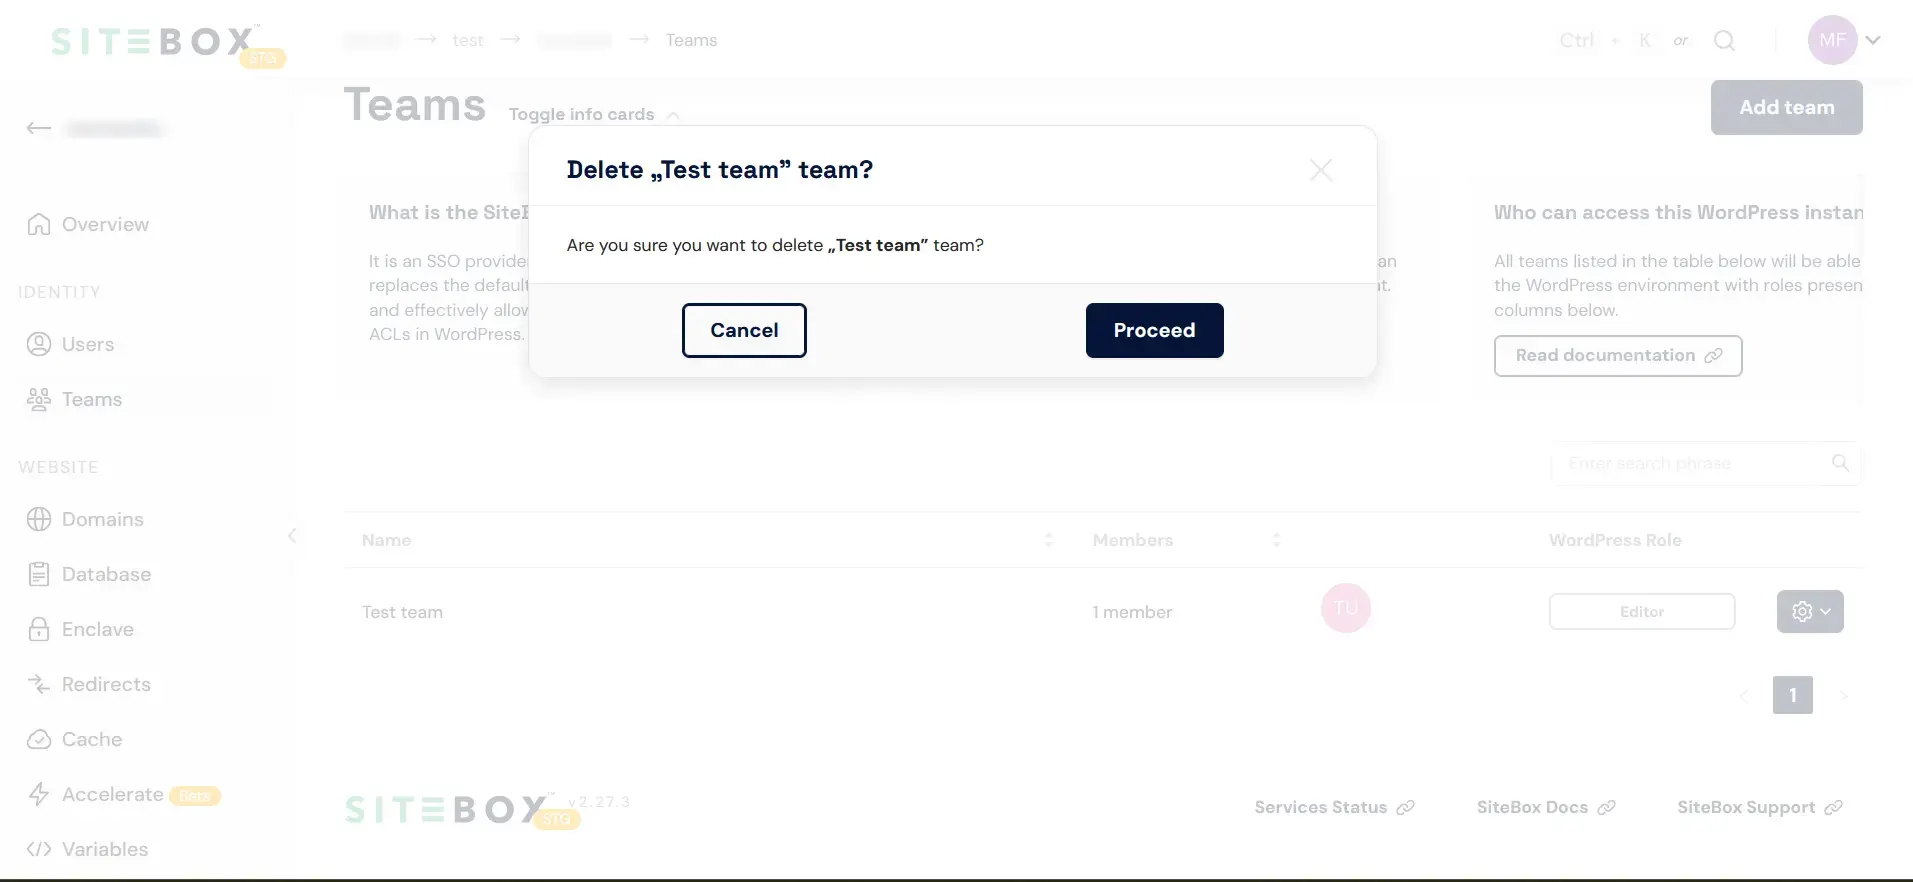
Click on the "Delete team" option. A popover will appear with the option to remove the team.
-
Click the "Ok" button within the popover.
By following these steps, the team will be successfully removed from your environment level.