Redirects management
Learn how to add, edit and delete redirect rulesExplore our Redirects management page for comprehensive instructions on performing any operation. Whether you're creating, updating, or importing records within the Redirects, this guide provides step-by-step instructions to streamline your record management tasks.
How to add a new redirect?
To activate Redirects in your environment you need to add at least one rule, you can do this by following the steps below.
-
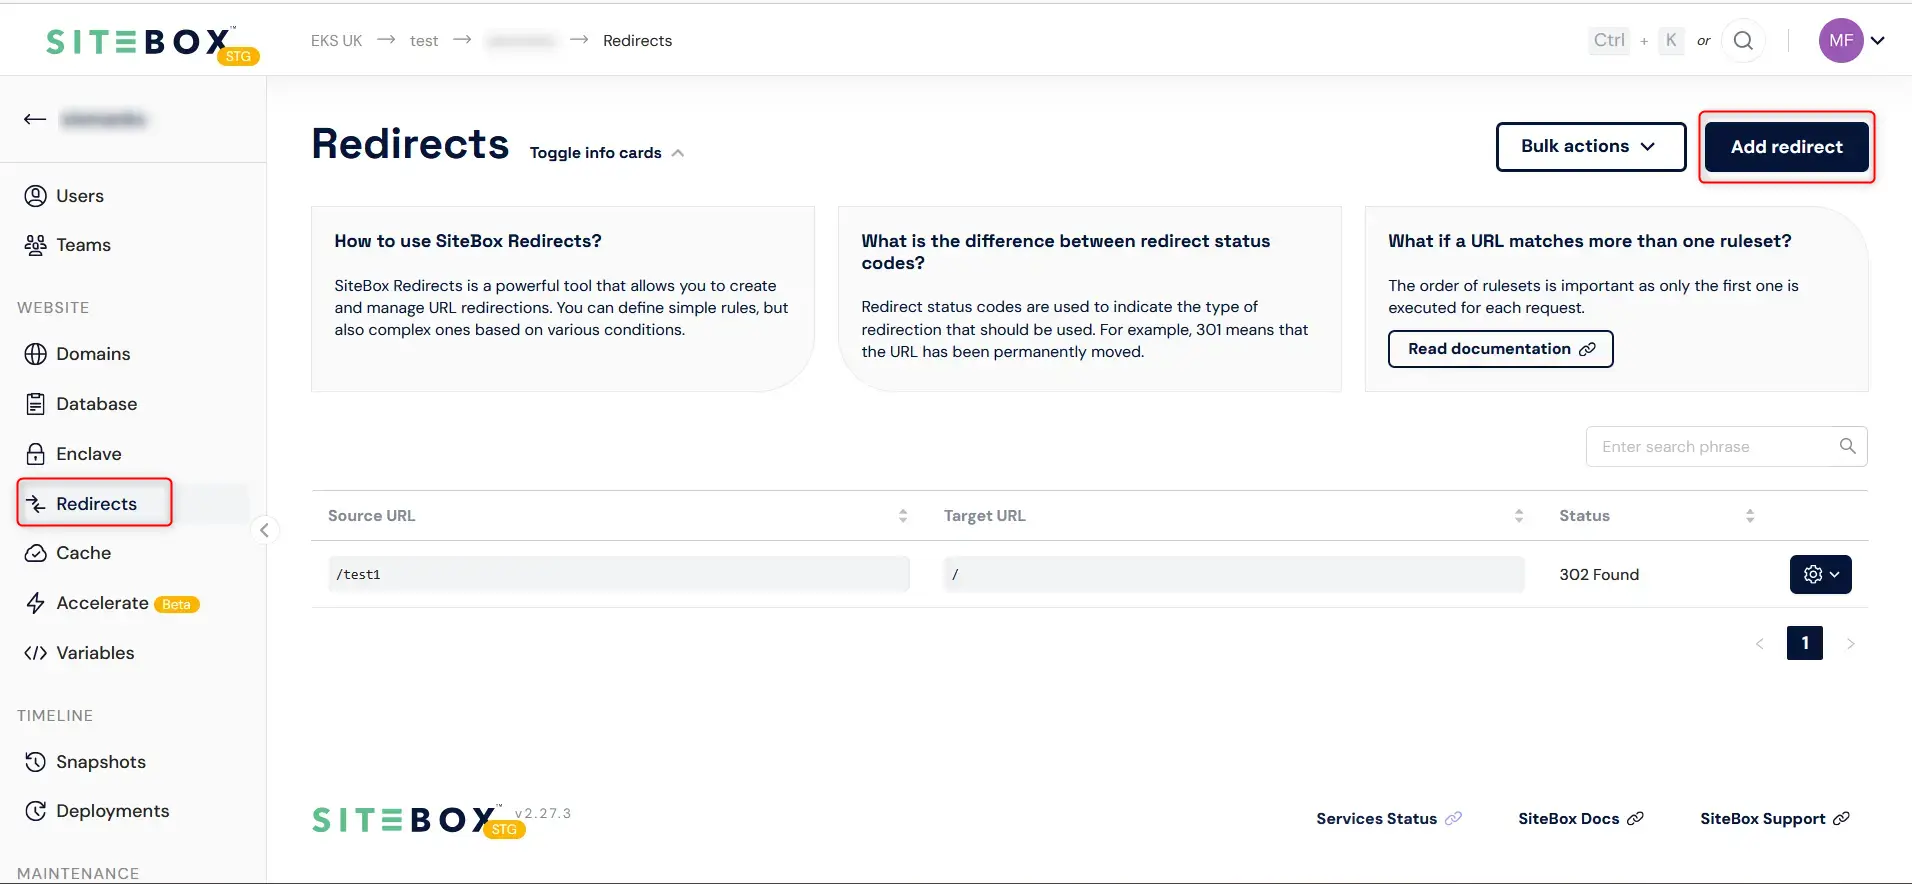
Begin by clicking on the "New Redirect" button found in the "Redirects" tab.
-
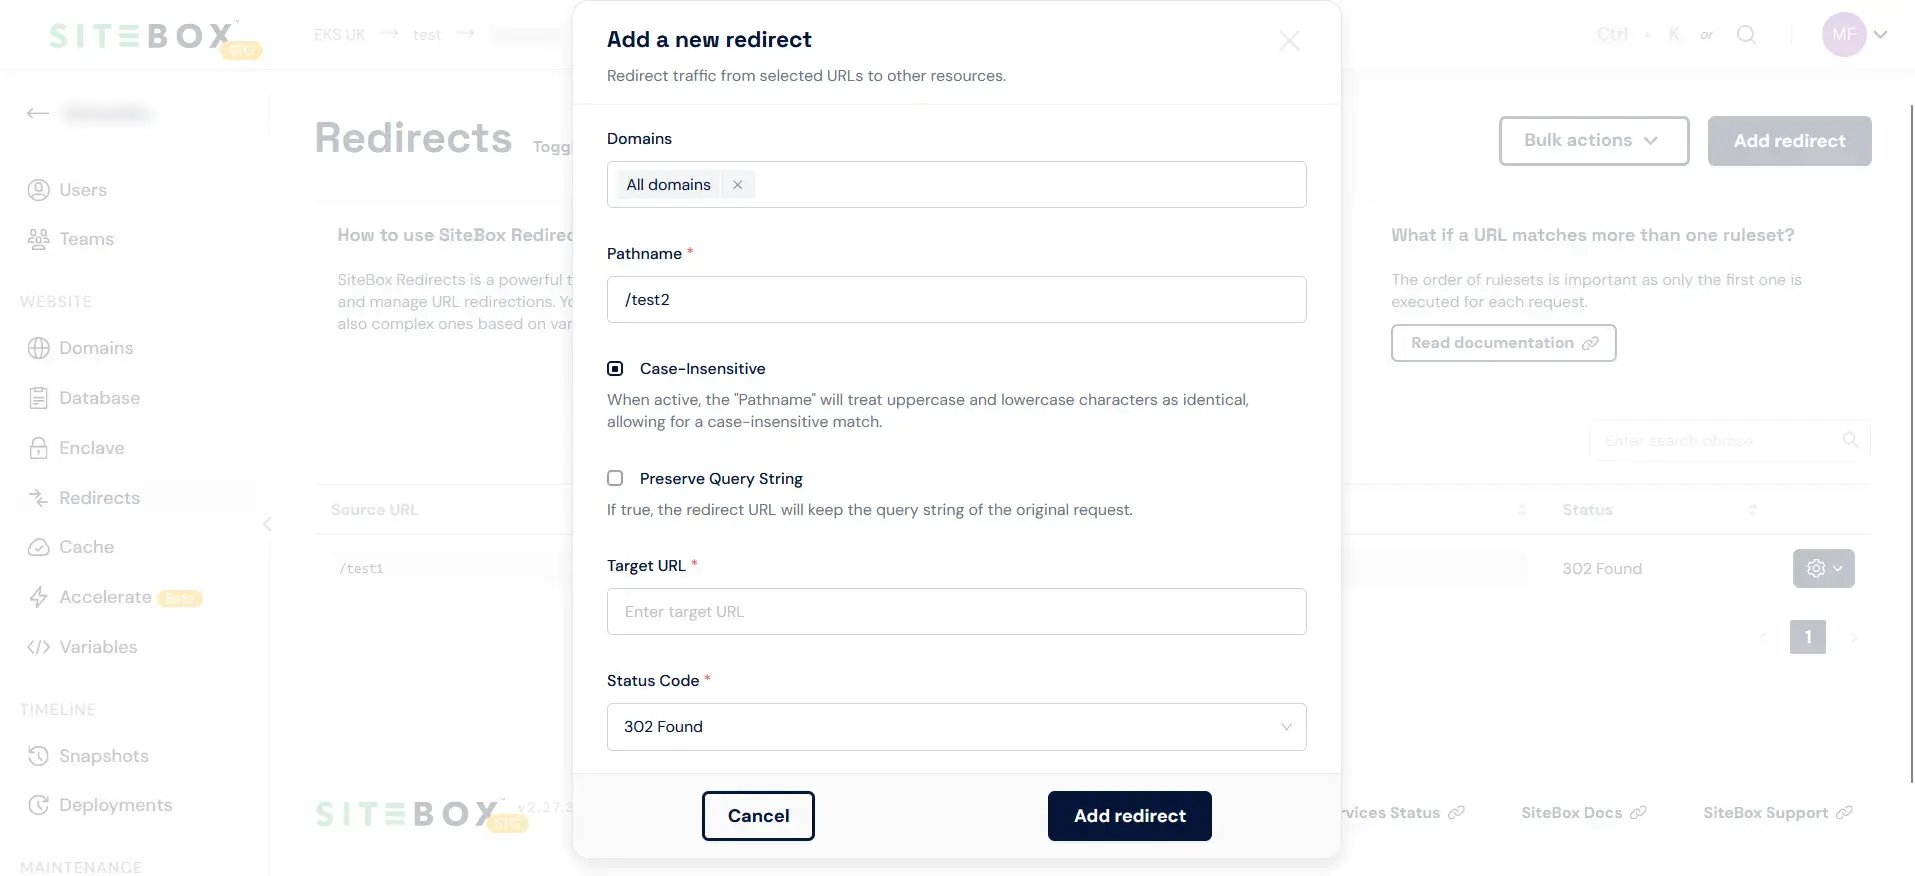
After clicking on that button, a modal will appear presenting view to create a redirect.
-
In the modal define:
- Domain – select whether redirect should work for all environment domains or a single one.
- Pathname – define redirect source pathname.
- Case sensitive – by clicking "Cc" button define whether source pathname should be matched in sensitive mode.
- Preserve query string – if chosen, the redirect URL will keep the query string of the original request.
- Target – define destination pathname (for internal redirect) or URL.
-
Click "Add a new redirect" to save new rule.
How to update a redirect?
To update an redirect, follow these steps:
-
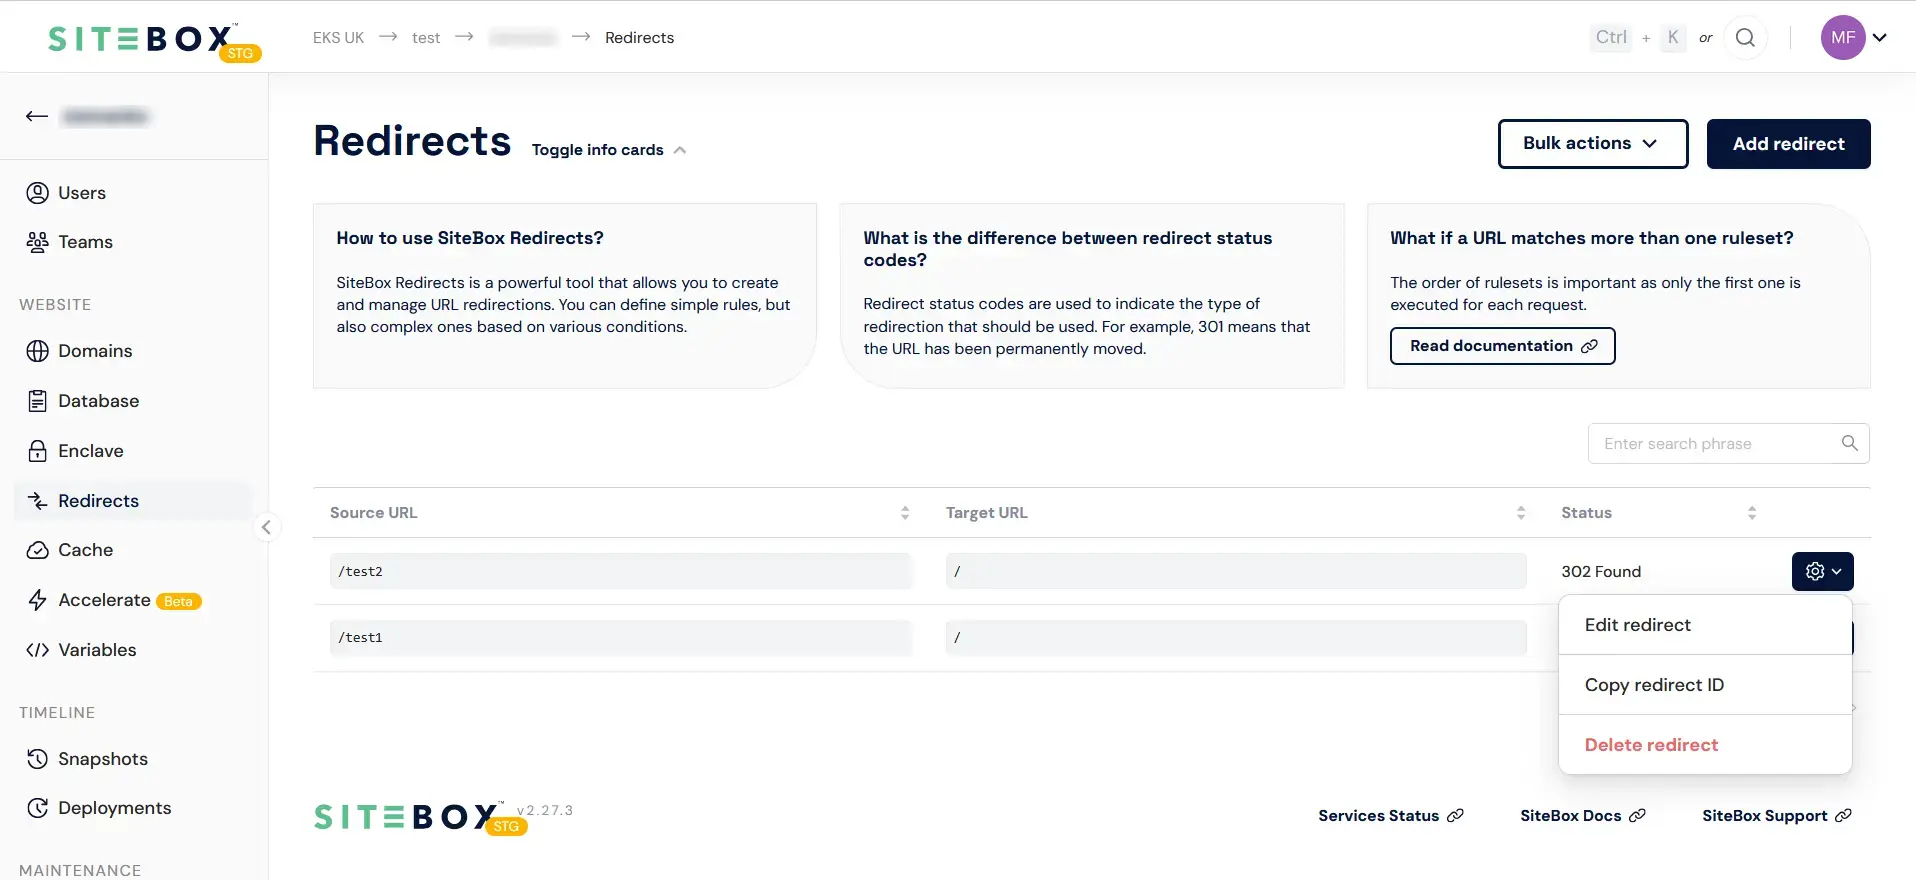
Within the Redirect rules list table, hover your mouse over the gear-shaped icon corresponding to the rule you wish to edit.
-
While hovering over the gear-shaped icon, the "Edit redirect" button will appear.
-
After clicking on that button, a modal will appear presenting view to edit a redirect.
-
Changes click "Edit redirect" to save new rule.
How to remove a redirect?
To delete an Redirect rule, follow these steps:
-
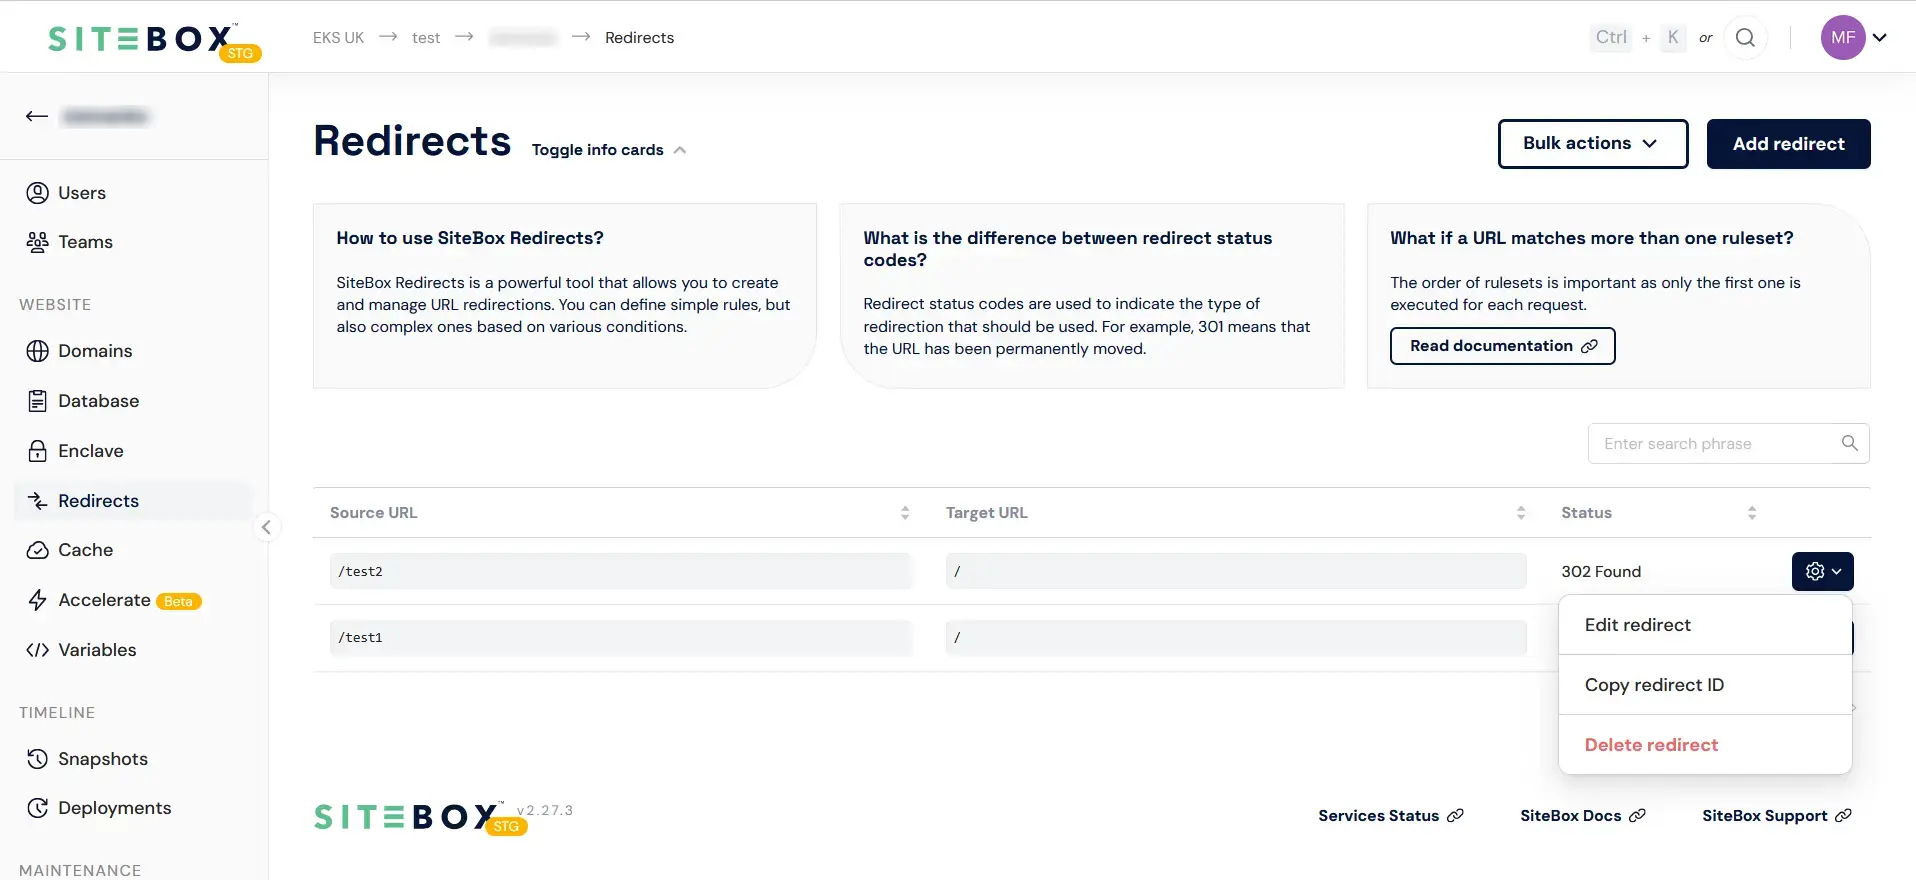
Within the Redirect rules list table, hover your mouse over the gear-shaped icon corresponding to the rule you wish to delete.
-
While hovering over the gear-shaped icon, the "Delete redirect" button will appear.
-
Upon completing this action, the redirect is now successfully removed from your environment.
How to import redirects?
To import redirects from the CSV file, follow these steps:
-
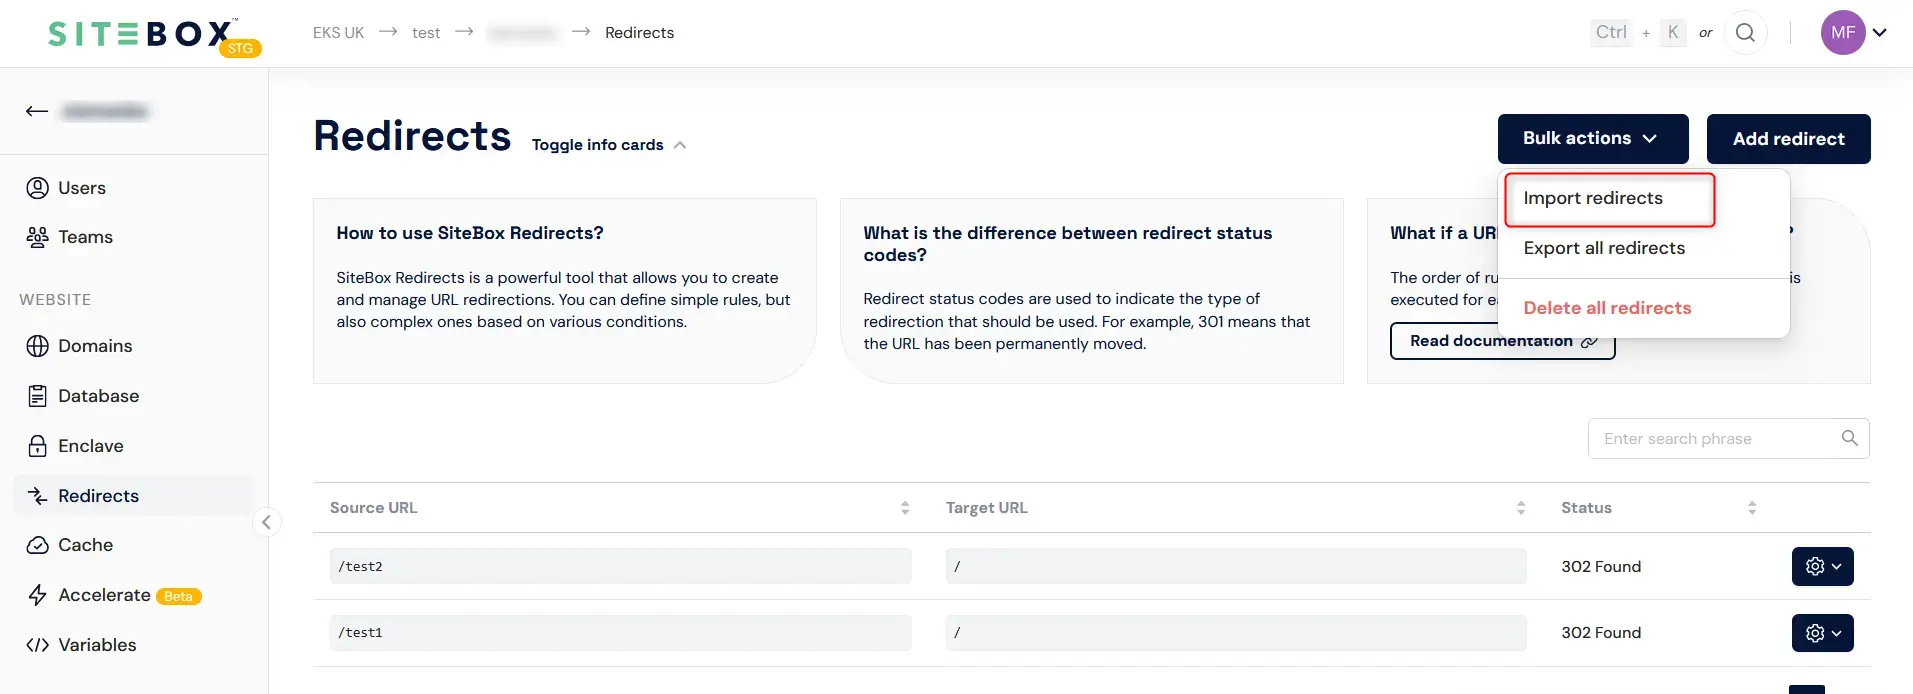
Begin by clicking on the "Import redirects" button found in the "Bulk actions" button on the top right corner.
-
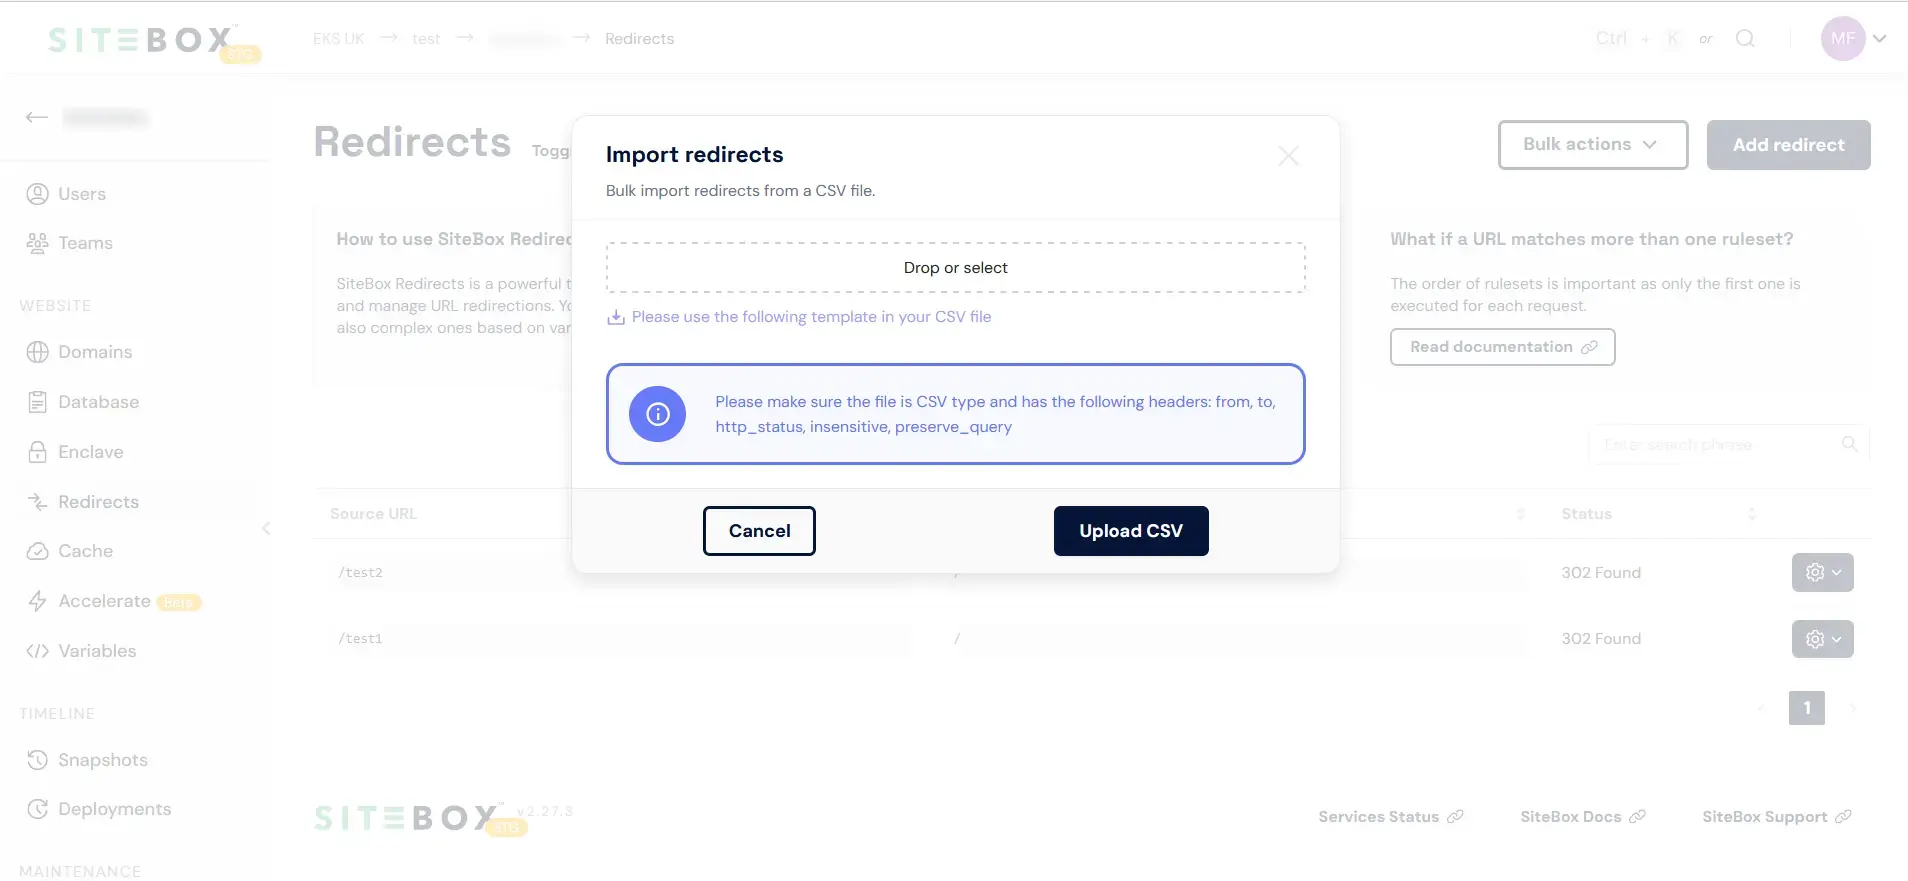
After clicking on that button, a modal will appear presenting view to import redirects from the CSV.
-
Select a CSV file from your local device which will be imported to the SiteBox.
-
Click "Upload CSV" to save new rules.